Supermarine Spitfire Mk I
- No.19 Squadron at Duxford, UK, in August 1938 -
(Airfix 1/48)
by Akio Hasegawa, M.D.
This kit is Airfix's 1/48 RAF Mk I Fighter, very early production and operational model.
I started this modeling in November 2012, exclusively in the weekend at Hayama's retreat.
(To view the images, click the underlined phrases, and to return to this page,
click RETURN key on the toolbar of your browser. All pictures here are shot by me, a seasoned-pathologist, with digital SLR Nikon D3000 Serial #2001042 with old Nikkor-S 35mm 1:2.8 Serial #380104, i.e., manual focus/manual exposure)

(Crick for English description)
This site is licensed under a Creative Commons License.
(Crick for Japanese description)
Completed Images
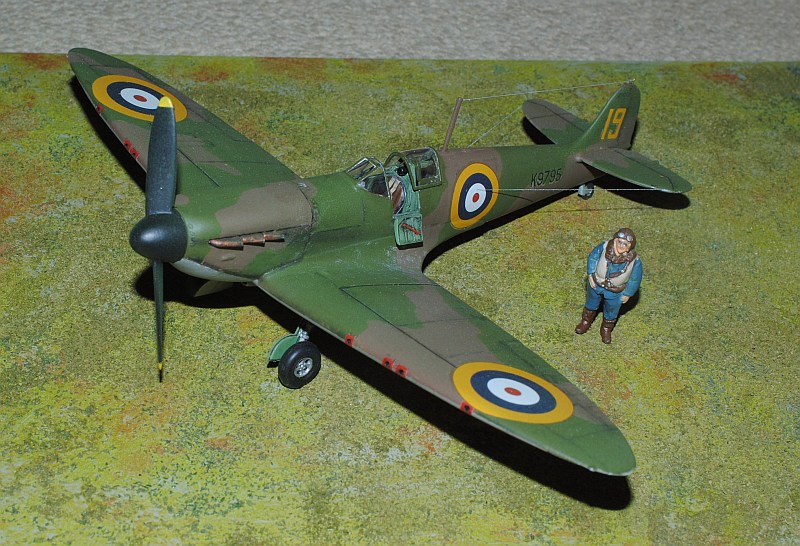
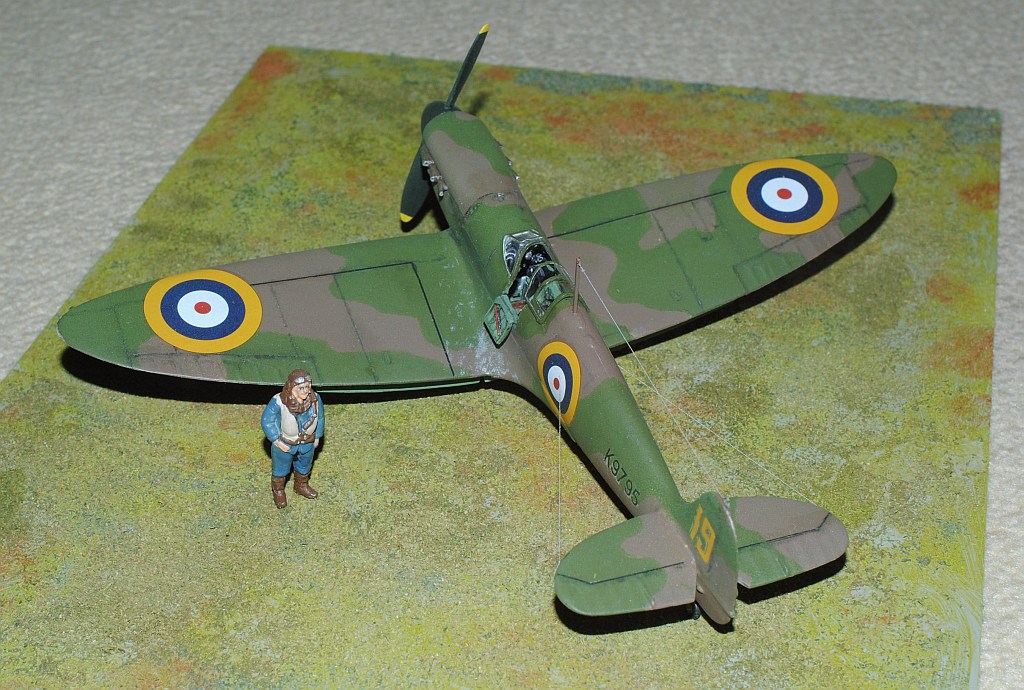
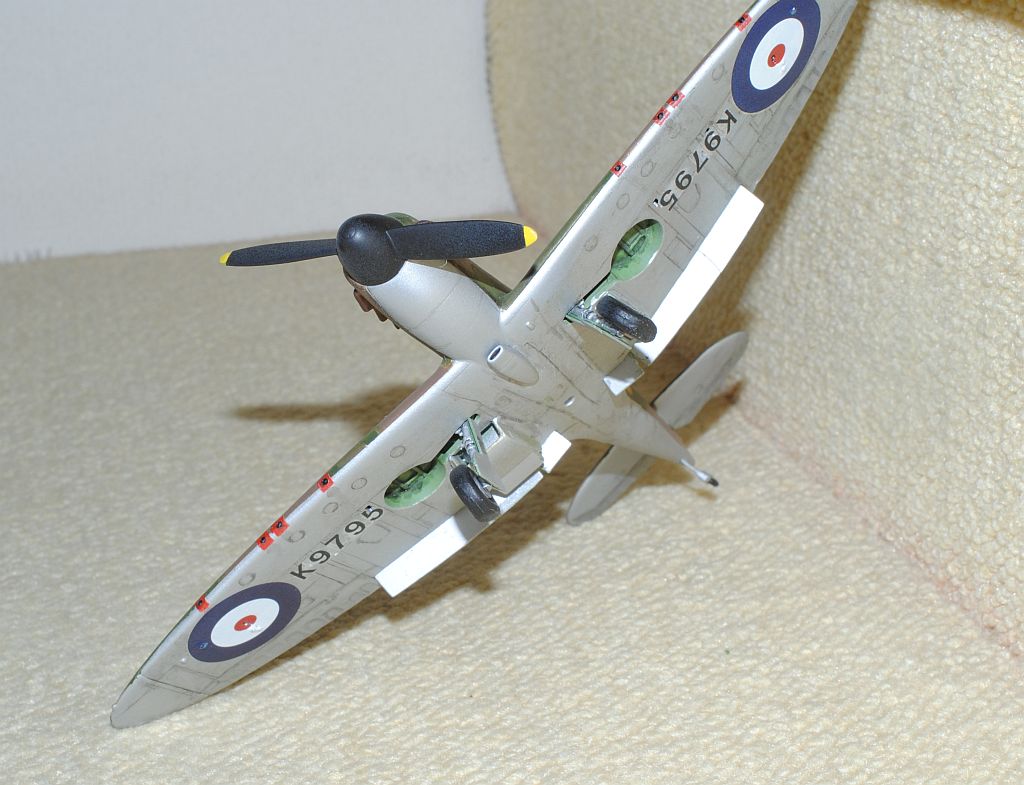
"Diorama completed on March 30 2013 (Serial # K9795)" (Crick to enlarge).
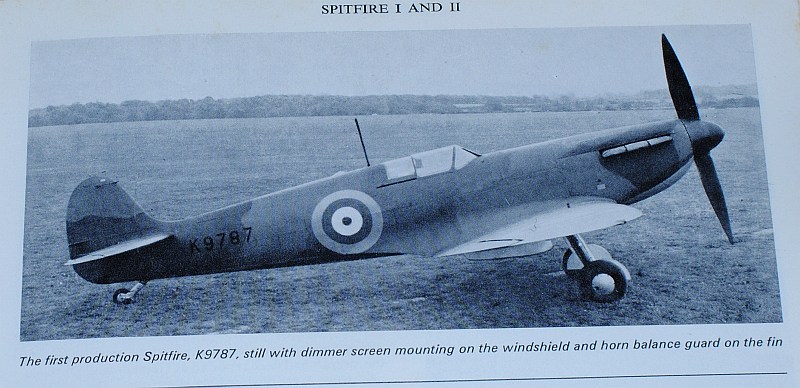
"Original image of Mk I - serial # K9787 - on the grass air field in 1938" (Crick to enlarge).
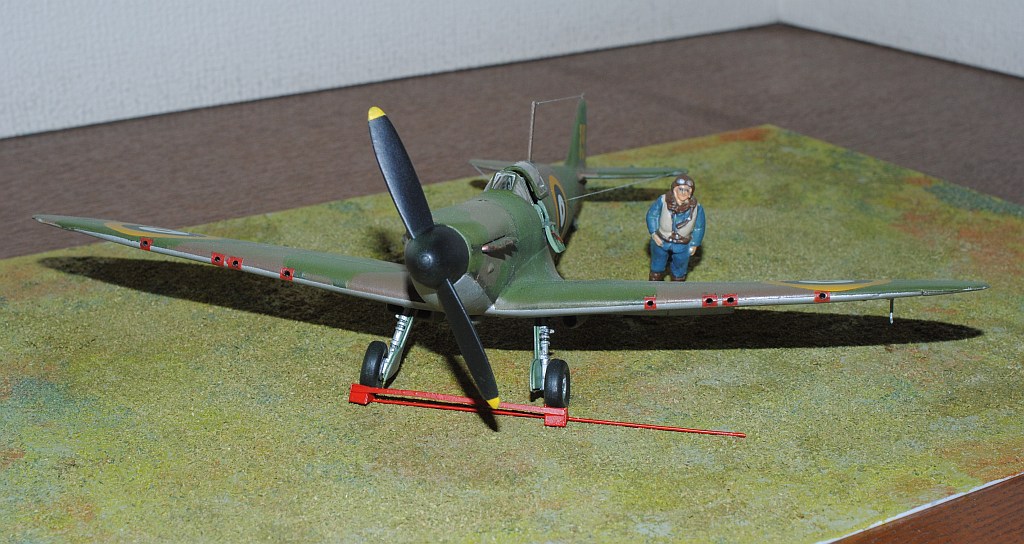
"Diorama completed on March 30 2013, with tyre stopper" (Crick to enlarge).
"Original image of Mk I with tyre stopper" (Crick to enlarge).

"Diorama completed on March 30 2013, with tyre stopper" (Crick to enlarge).
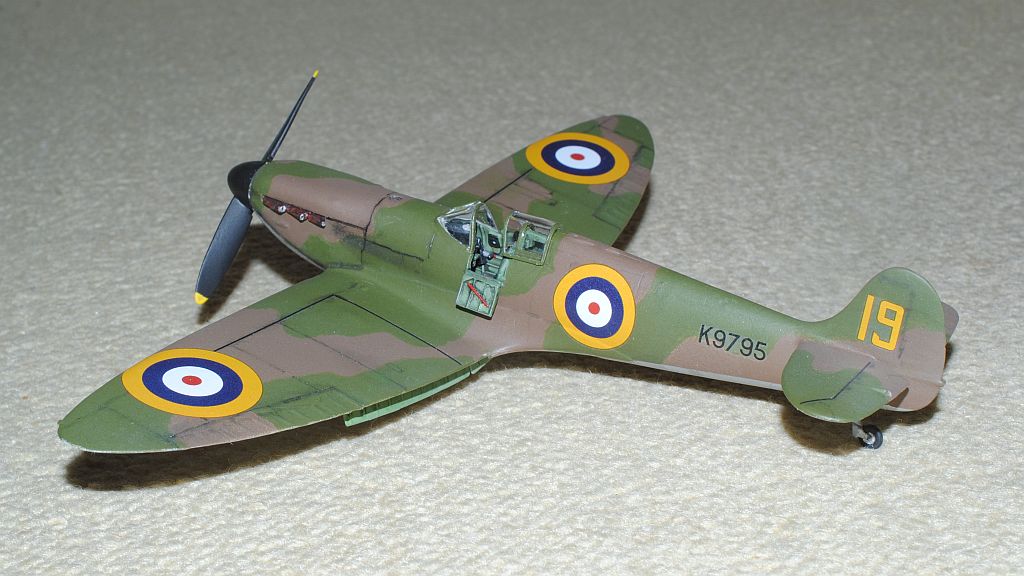
"Diorama completed on March 30 2013"(Crick to enlarge).
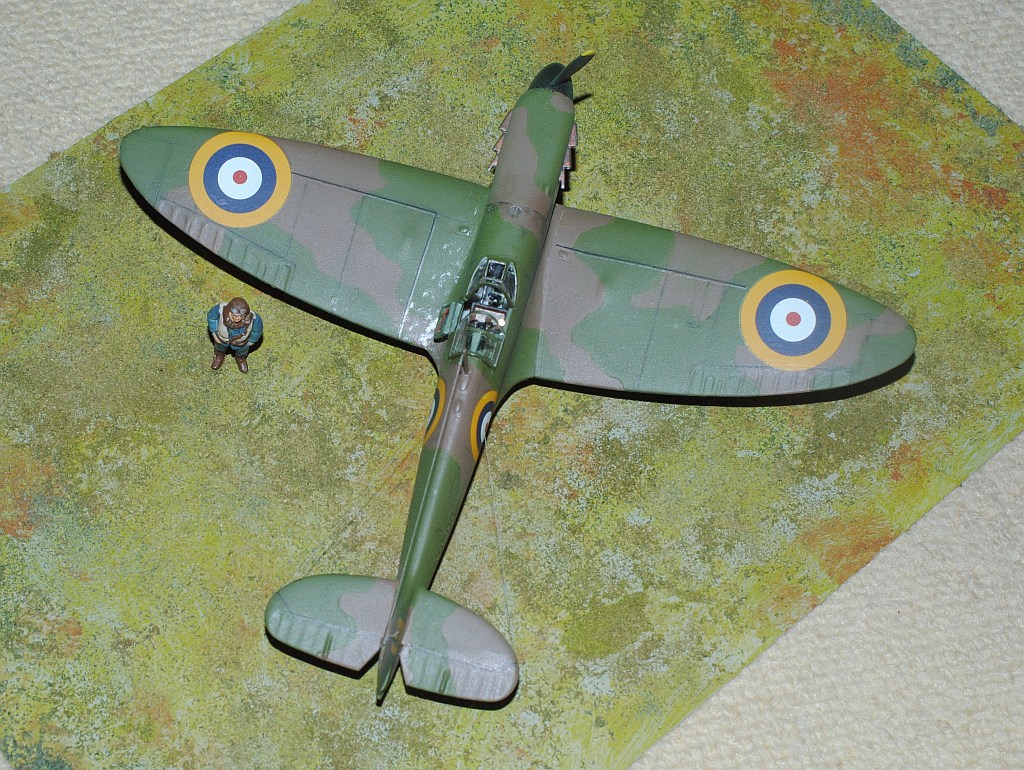
"Diorama completed on March 30 2013" (Crick to enlarge).
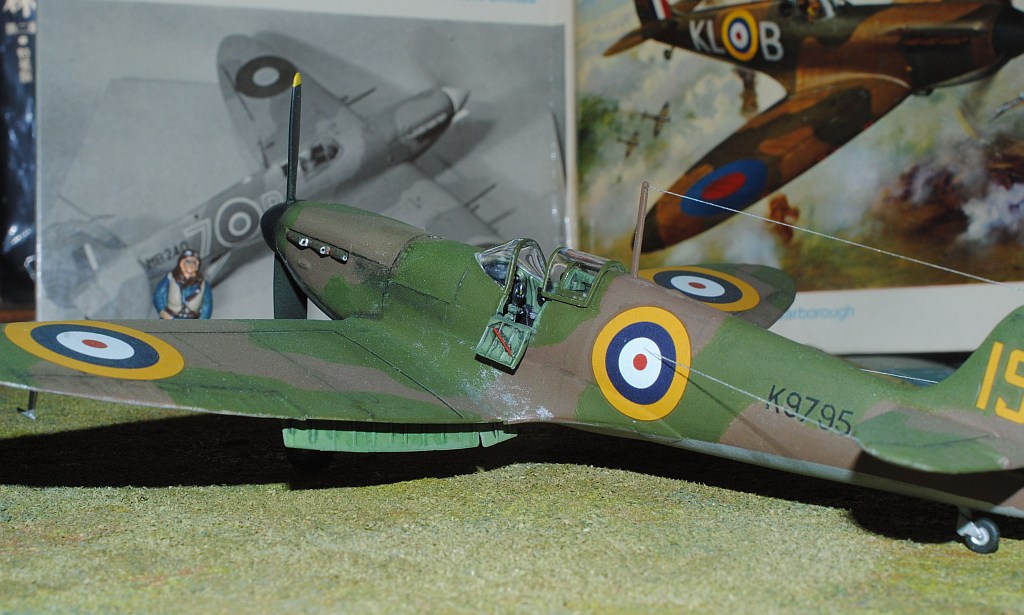
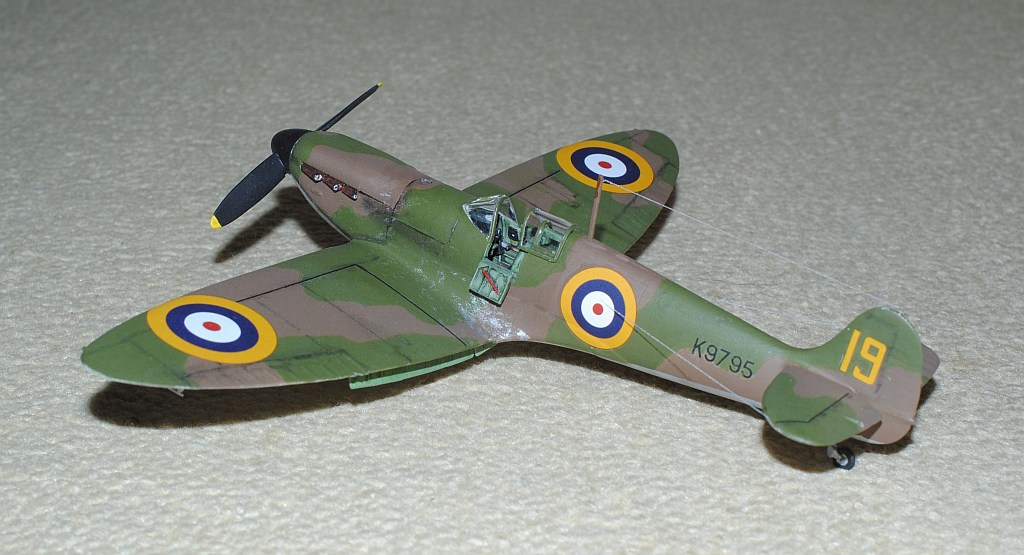
"Diorama completed on March 30 2013" against a background of reference book (Crick to enlarge).
Chronology
2012.11.18. Pilot figure is painted using Hasegawa WW.II Pilot Figure Set (standing in the right side - sitting RAF pilot in the left is from the Airfix box original, and standing Japanese pilot in the center is for my Hayate project, which appears in the diorama as this).
2012.12.01-02. Cockpit interior was glued and painted. I brushed with diluted Tamiya X-19 "Smoke": After assembly - 1, 2 -
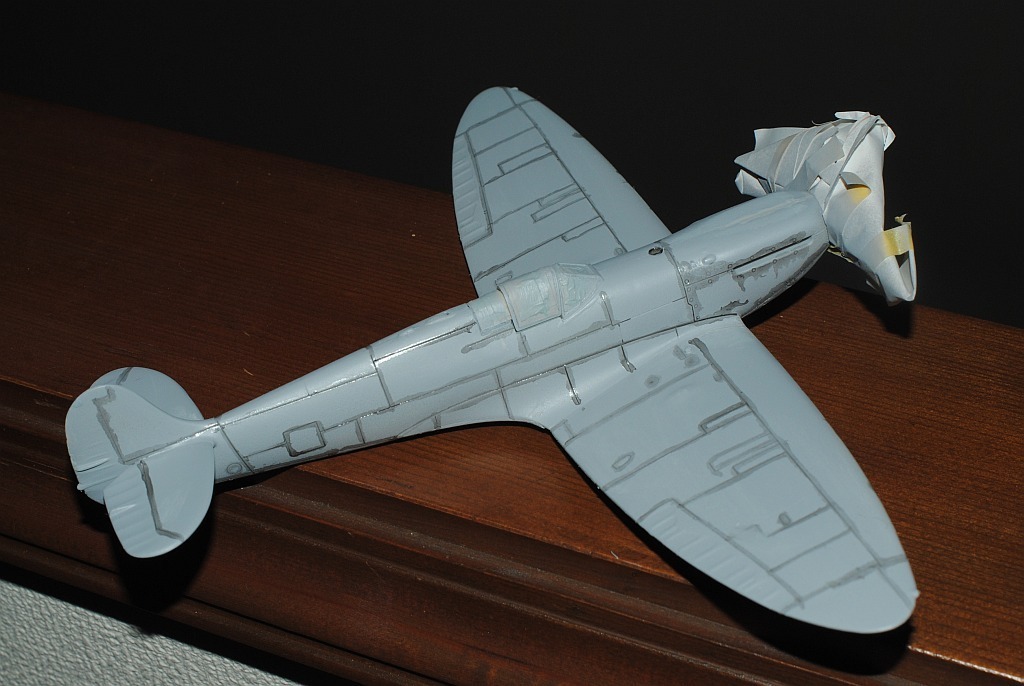
2012.12.08-09. Before the upper and lower main wing is glued, the trailing edge of the inner side of the main wing is sanded to a thinner edge (the original is really meaty dull). As indicated at hyperscale.com page by Mr. Brett Green, in order to fill a gap between the wing and fuselage at the wing root, the width of the lower fuselage needs to be widened by impromptu spread bar (glued, blue arrows), the length of which must be adjucted by trying and figuring out. Upper view of trial assembly of the fuselage and the main wing - The length of the bar must be adjusted simultaneously for a proper dihedral angle of the main wing and no gap to be achieved when main wing is folded in the blue-arrow direction. Holes are bored to the wheel hub of the main undercarriage using pin vice, after painting in black and silver.
2012.22-24. Main wing and tail horizontal wing is glued with fuselage, paying attension to consistent dihedral angles of both the wings (tail wing is of course horizontal in straight line). I used tape to fix the proper angle. Residual gaps were filled with Tamiya Liquid Surface Primer, and two-blade propeller and spinner is masked with sol after painted in black. Frontal edges of underwing air inlets (radiator) are sanded to be sharpened or rounded before glued.
This weekend's achievement (Already elegant outline is acknowkedged)
2013.1.12-14. After masking the canopy, surface primer is sprayed. Panel lines are roughly traced with diluted Tamiya X-19 "Smoke" - upper surface, and lower surface, followed by. flat silver being sprayed on the lower surface.
This weekend's achievement
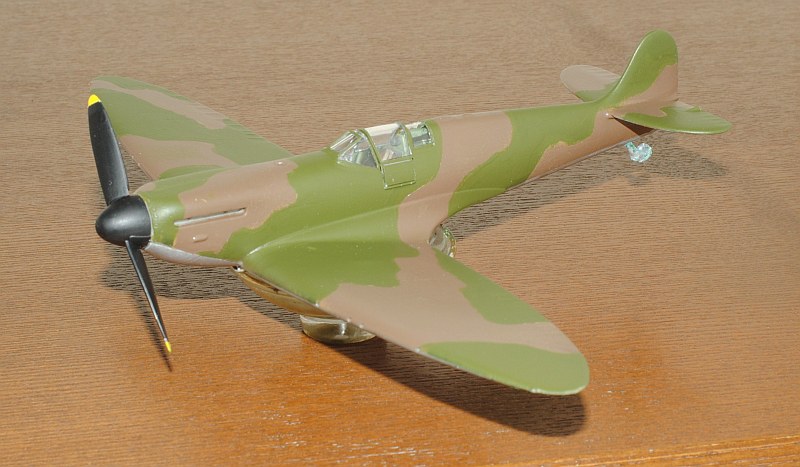
2013.2.9-11. Upper surface comouflage painting starts. Firstly I try brush painting, using White Ensign ACJ14 "Earth Brown" (actually for WW2 Japanese planes) and ACLW19 Olivegrun RLM 80 (actually for WW2 Luftwaffe). I happened to come across these two cans on special sale at Akihabara, and purchased from curiosity, however, these revealed too thin for amatuer brush painting, it seems. Probably these are suitable for spray painting. I appreciate to receive information re. how to utilize these authentic-brand paints. Then anyway, I change the course to familiar Tamiya spray painting, and as before parting line was set using Blu-Tack covered with masking paper, the same procedure as performed on Gloster Meteor (Tamiya 1/48) on April 14 2012. Dark earth (TAMIYA AS-22) is sprayed this week.
2013.2.16-17. Upper surface dark green (iMr Hobby) is sprayed after parting with Blu-Tack and paper. I in some trepidation detached masking tapes of the wind shield glasses, and minimal touch-painting wth dark green was added. The other view angle, and close-up view of cockpit.
This weekend's achievement
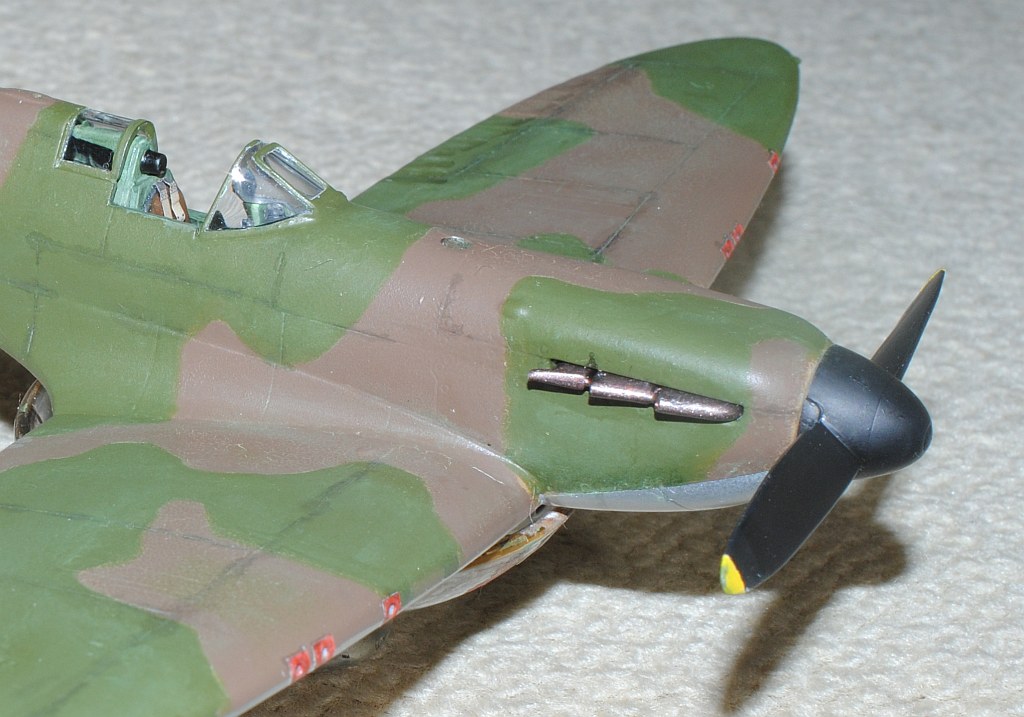
2013.2.23-26. Upper surface is weathered with MIG Pigments Wash, which is very thinnly-mixed with water and wiped off, again, again, once again. Ports of 7.7 mm machine guns are painted red (1/2 flat red + 1/2 flat base, Tamiya) after masking with tapes. Upper and under surface panel lines are again traced with Tamiya's panel line accent color. "Fishtail" exhaust manifold is painted with brush; Tamiya's surface primer liquid --> Mr.Color No.215 Copper --> ditto. No.61 Case-hardened Steel, ditto the other side, ditto closed-up view, which reveals roughcast. Take notice that this is still preliminary step.
This weekend's achievement
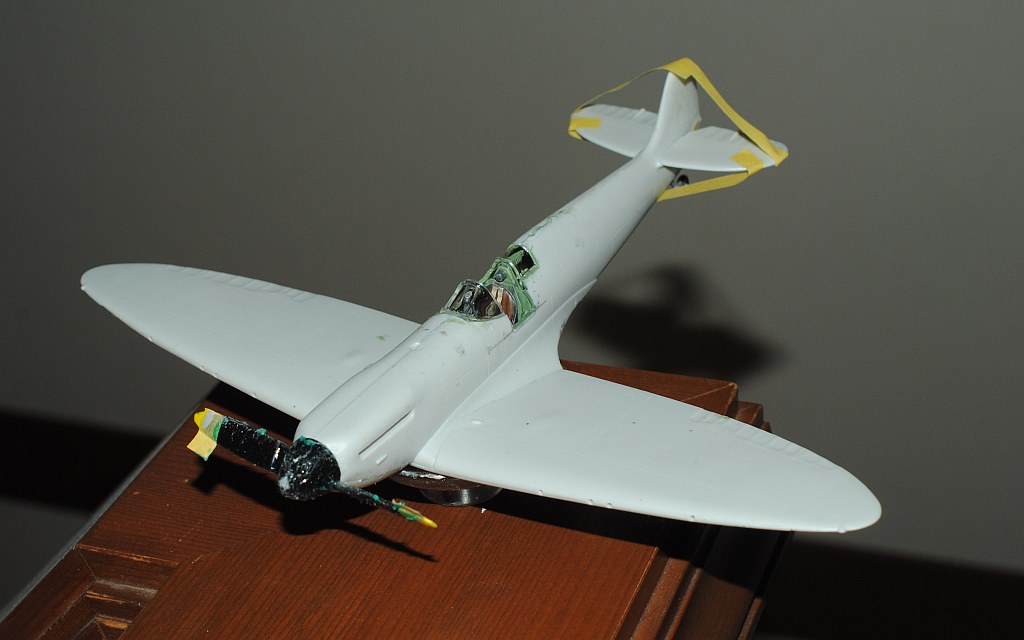
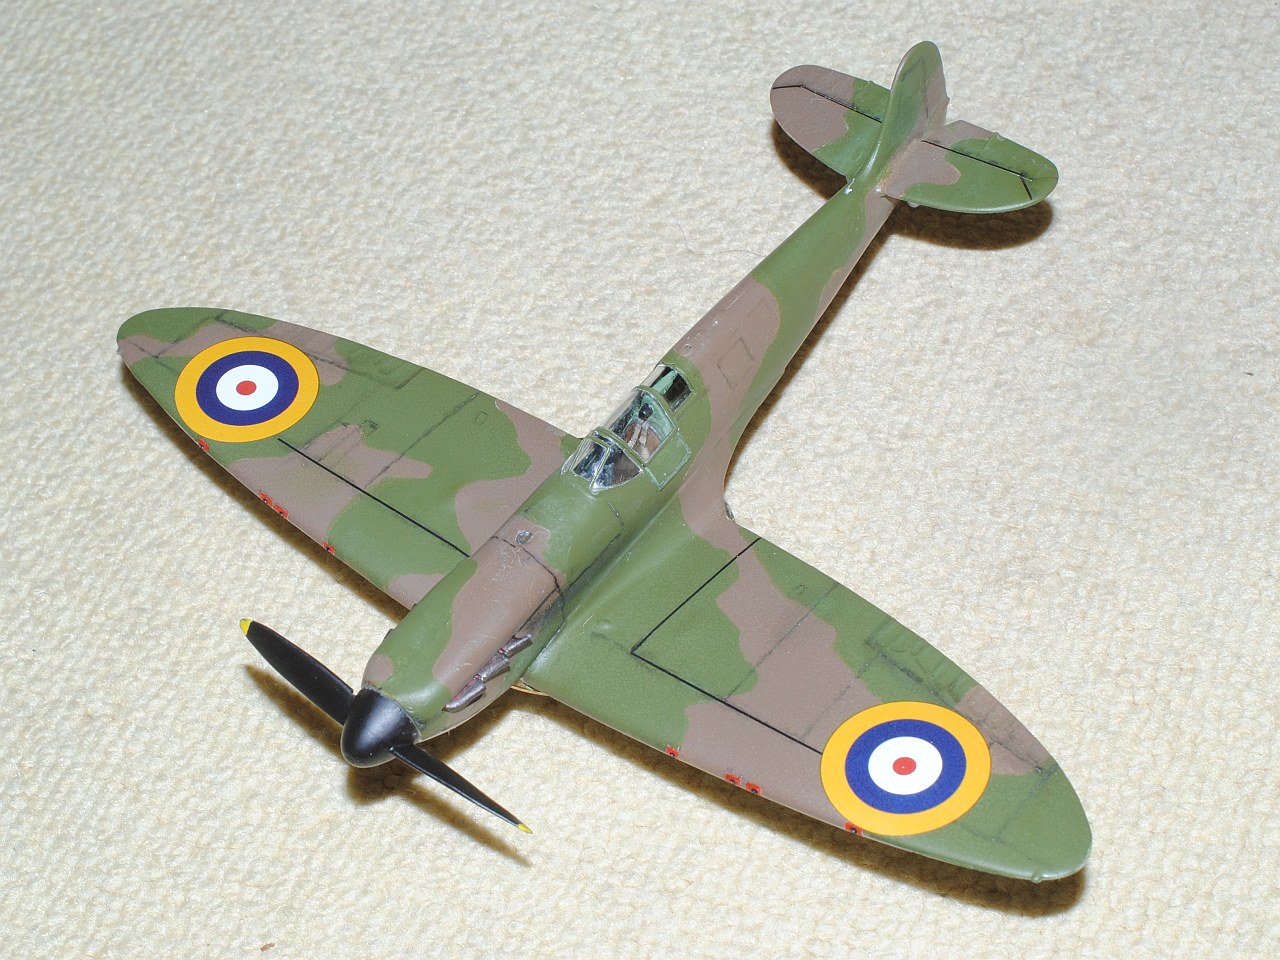
2013.3.2-3.3. I firstly corrected ditch of bonding plane of two parts of spinner with Tamiya liquid patty, sandpaper # 1200 and Tamiya polishing compound (cf. the image just before - The last weekend's achievement). After decals are applied on the upper surface of main wing (L-shaped black walking line and national insignia), upper suface is sprayed with My Hobby's clear mat topcoat for preservation of delicate decals of thin walking lines, which accomplished smooth surface texture. Looking not bad up till the present: Photo-1, Photo-2,
Photo-3 (Unique entry flat -port- is temporarily embedded - not yet glued).
This weekend's achievement
2013.3.9-3.10. At temporary assembly of undercarriage, I am not satisfied with original tyre parts which are simply molded in circle, so I retrofit them into deformed shape due to compression by gravity. Firstly the base is trimmed with sand paper, then roughly swelled laterally with putty, and brushed with Tamiya surface primer. The results look pretty good form (I fix parting line of tyres later with sand paper).
The underside of the cockpit aft glazing is grinded down (yellow arrows) with chisel in order to lessen upward bulge of plexglass canopy in opened (backward) condition. This is not completely corrected, and ideally I should make the plexglass canopy anew with thin tranparent Celluloid. After flaps are glued and remaining decals are applied, the entire airframe is sprayed with My Hobby's clear matt Topcoat. Entry flap to the cockpit is glued - Photo-1, Photo-2. The underside is checked. The remaining task is to install aerial mast with delicate and risky IFF aerial wiring. Anyway, so far, so good.
This weekend's achievement
This weekend's achievement
2013.3.16-3.17. I install aerial mast with delicate and risky IFF aerial wiring, using disposed stocking line, lateral view, anterolateral view,
posterior view. After adding final silver touch to posterior wing edge for stepping scrape, I relish with humble White Horse on the Rock, while gazing in different angles.
This weekend's achievement
2013.3.30. I make grass field for diorama. The technique is just like that used in Hayate project on 2012.10.6-8 . Some images are helpful -"Original image of Mk I - serial # K9787 - on the grass air field in 1938", from ref.2. Then, prompted by the images, Photo-1 and Photo-2, I try to make tyre stoppers. After some thinking experiment, I fabricate the tyre stopper with 0.3 mm thick plastic plate and 0.7 mm stainless wire. After painting flat red and the whole aircraft is sprayed with very very diluted MIG Pigments Wash by water, using lately purchased Zoukeimura Airtex2 at Volks Akihabara, this project is finished.
This weekend's achievement
This weekend's achievement
References:
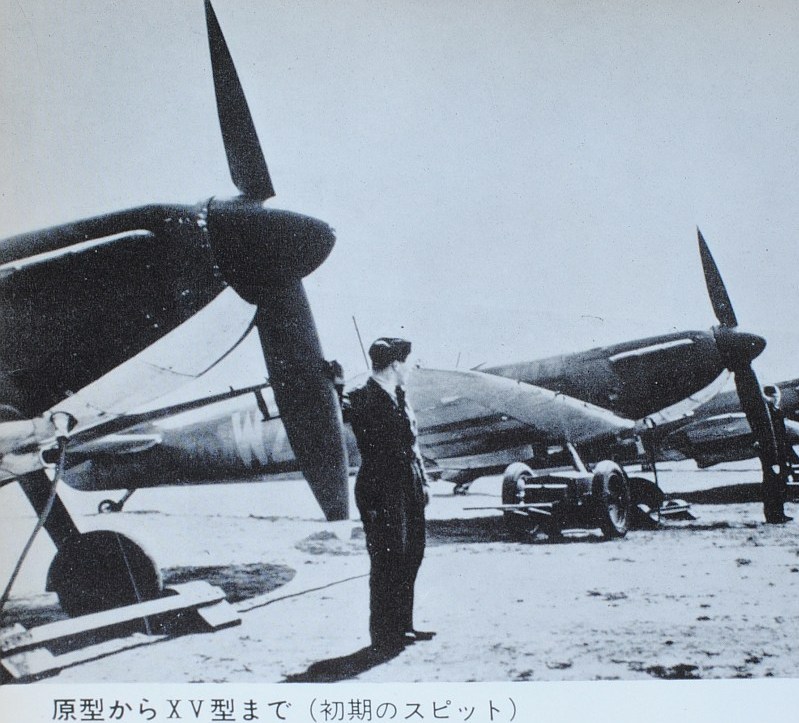
1. The Wings of The World ("ÉóŖEé╠Śā, Sekai No Tsubasa"), Showa 17 (1942), the Greater Eastern Asian War edition. By Asahi Newspaper. (Photo 1: Cover sheet, Photo 2: pages on Spitfire,
Photo 3: ditto, caption)
2. Roy Cross and Gerald Scarborough. Spitfire - Classic Aircraft No.1, Their history and how to model them. Patric Stephans Ltd (ISBN 0-85059-082-5).
Back to "Scale Model Hobby" Index Page
version 1.00 2024/8/1
Please send your comments to akio-h@fg-khn.jp
Back to previous Home Page at AOL (Till October 31 2008)
Back to previous Home Page at geocities.jp web host (Till March 31 2019)
Back to New Home Page (Translocated Sakura server)