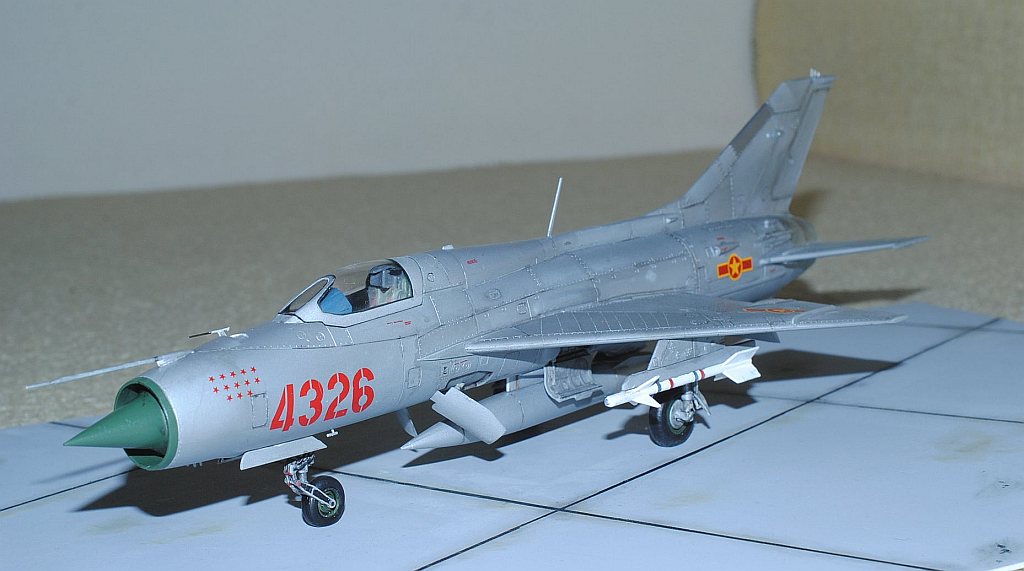
MiG-21 PF Fishbed D
- No 921st Fighter Regiment "Sai Do"
of the Vietnamese People's Air Force (VPAF) -
(Academy 1/48)
By Akio Hasegawa, M.D.
(To view the images in each page, click the underlined phrases,
and to return to this page,
click RETURN key on the toolbar of your browser

(Crick for English description)
This site is licensed under a Creative Commons License.
(Crick for Japanese description)
Completed Images
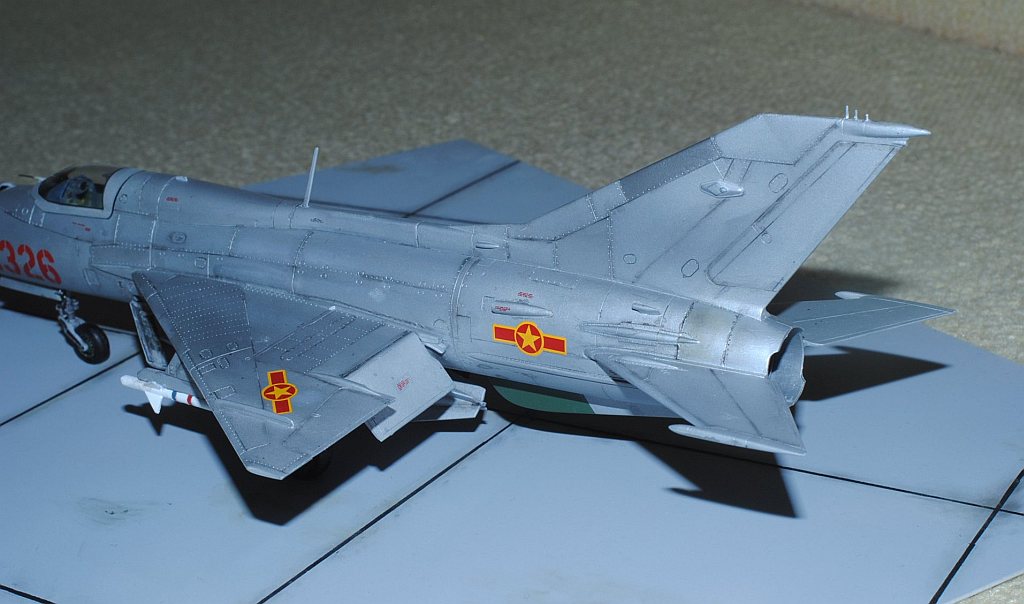
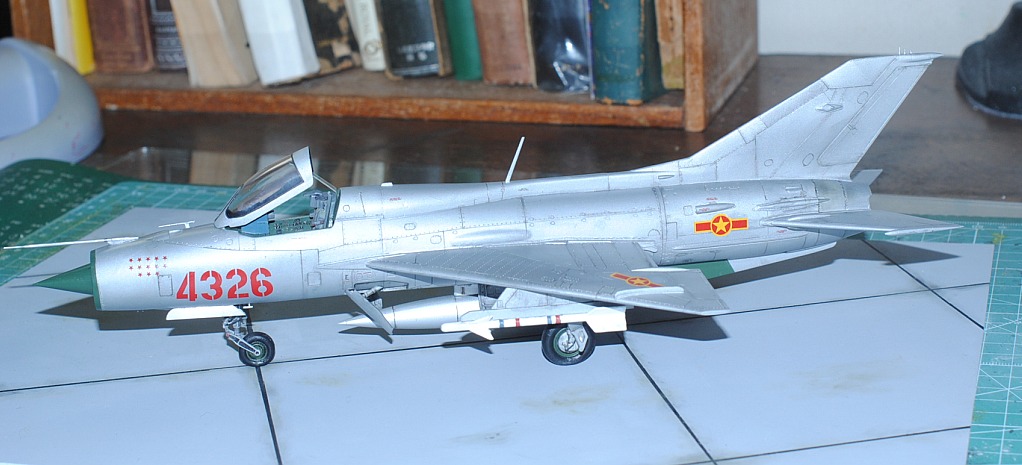
"Diorama completed on August 31 2013" (Crick to enlarge).
"Diorama completed on August 31 2013" (Crick to enlarge).
"Diorama completed on August 31 2013" (Crick to enlarge).
"Diorama completed on August 31 2013" (Crick to enlarge).
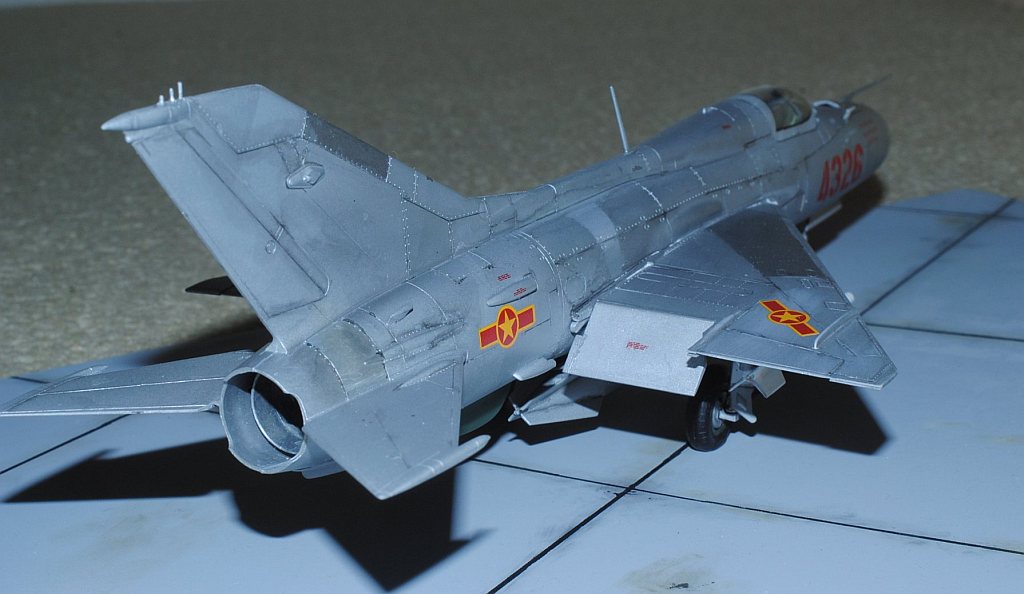
"Ditto, tail section" (Crick to enlarge).

"Diorama completed on August 31 2013" (Crick to enlarge).
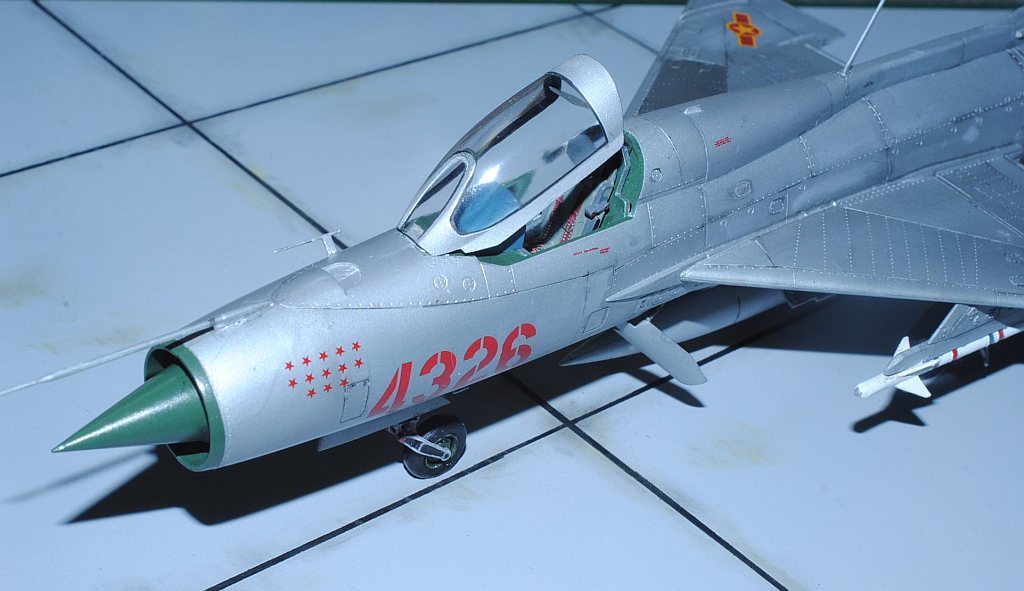
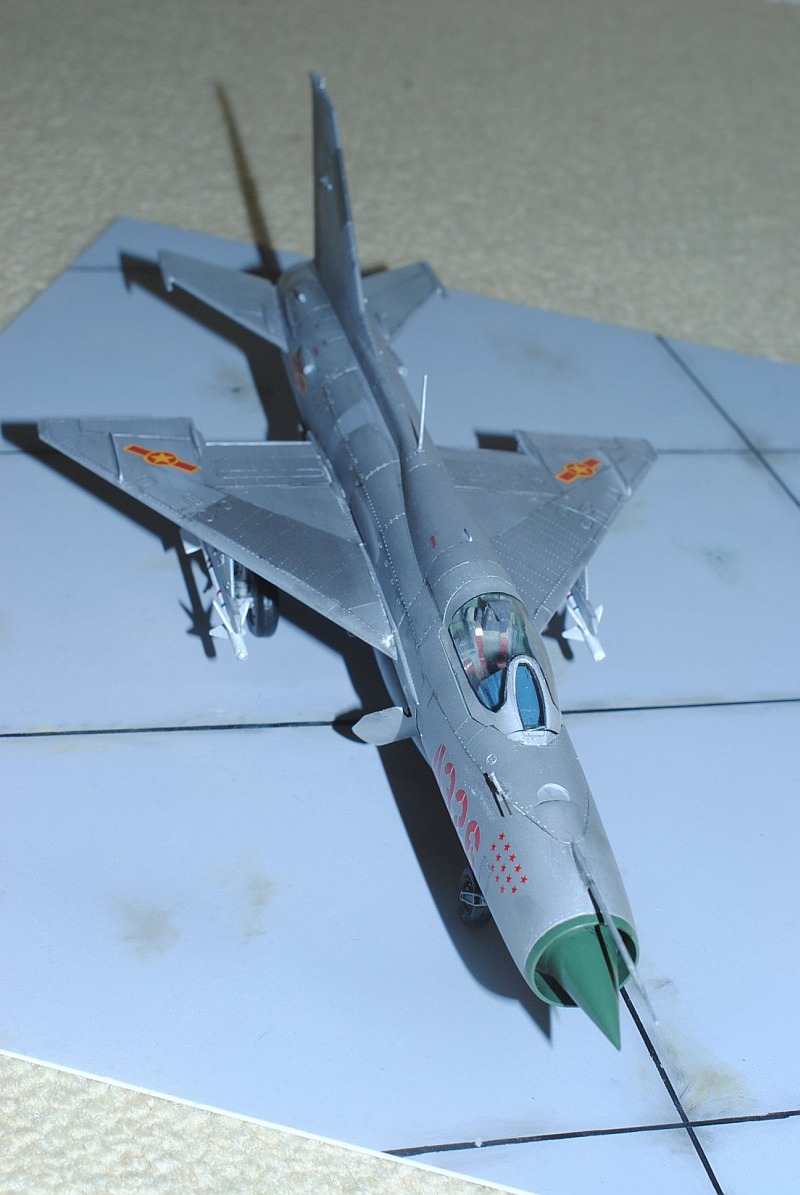
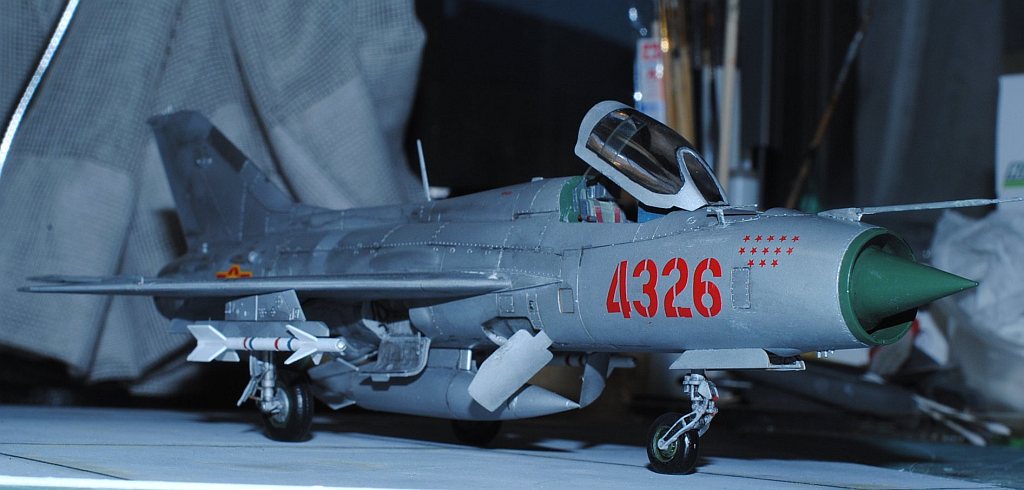
"Enlarged view of nose section (left side)" (Crick to enlarge).
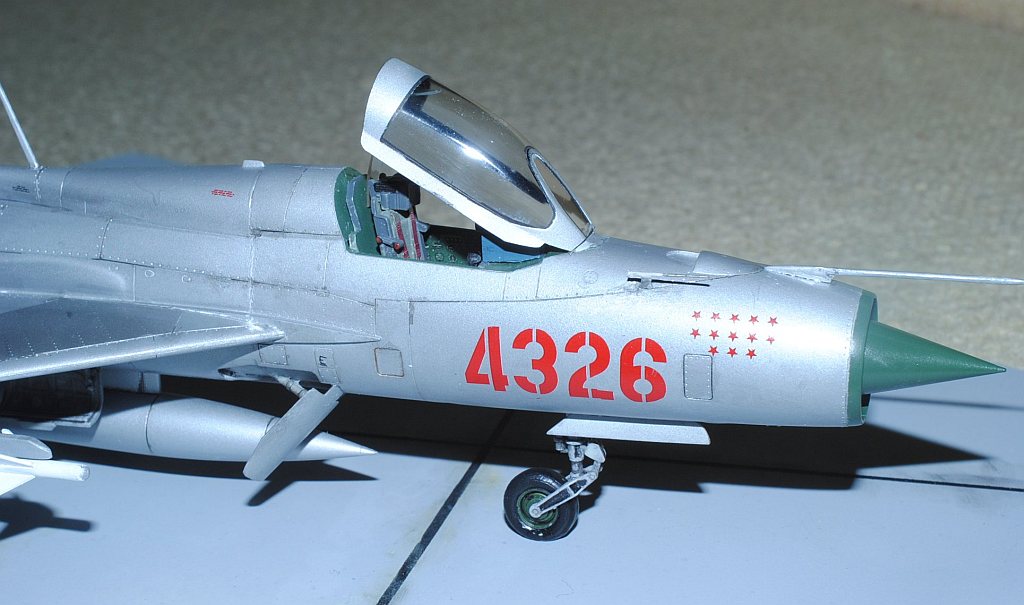
"Enlarged view of nose section (right side)" (Crick to enlarge).
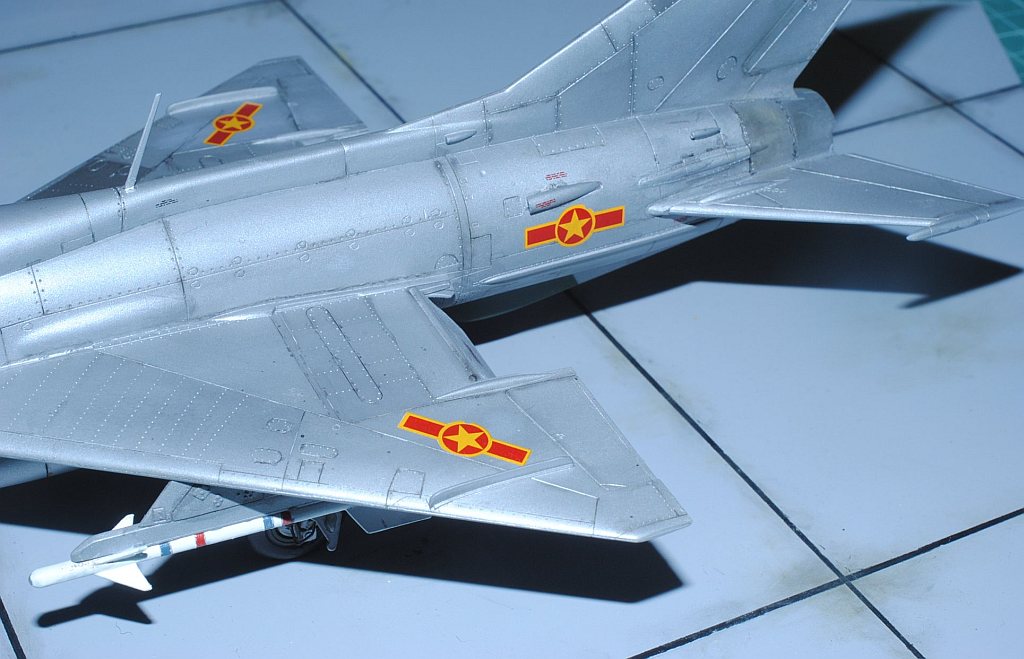
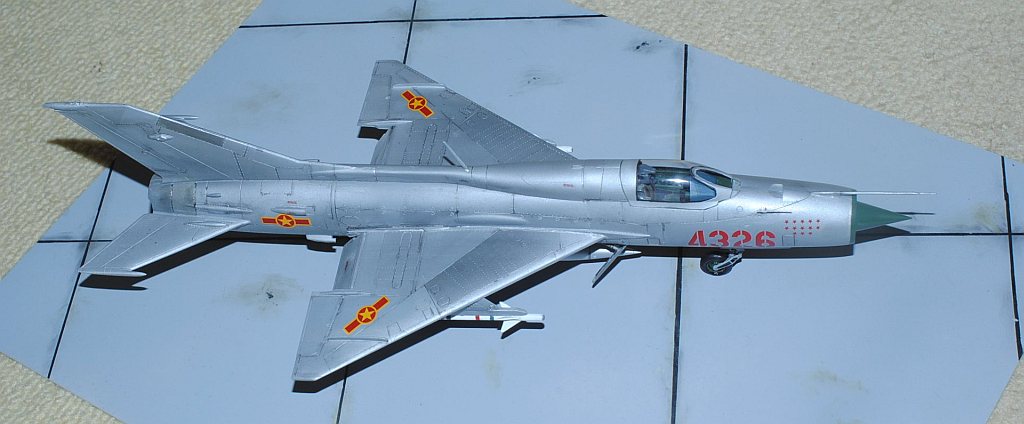
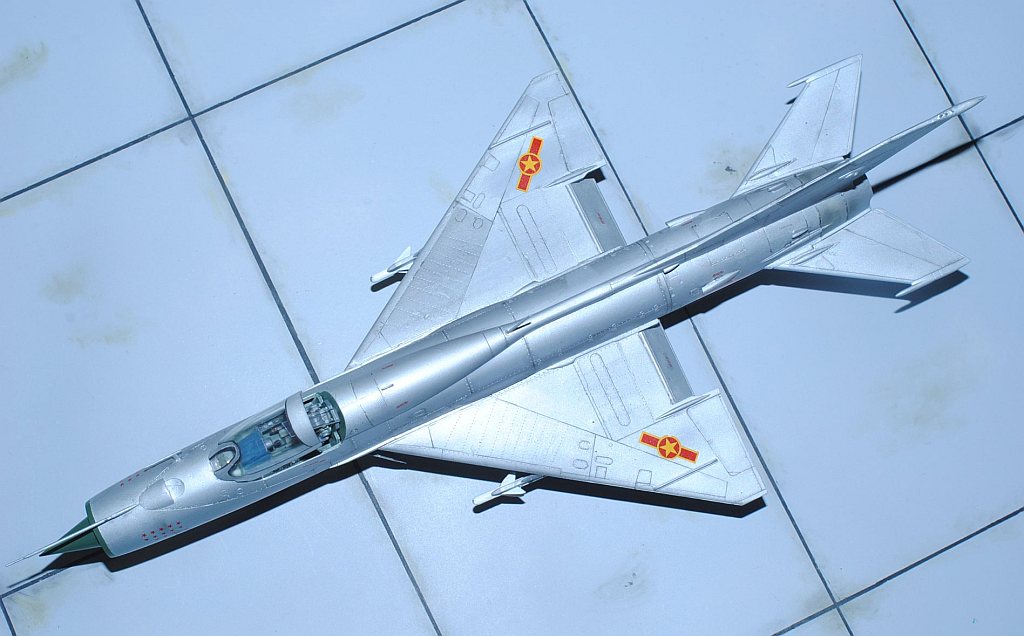
"Enlarged view of middle section (upper surface)" (Crick to enlarge).
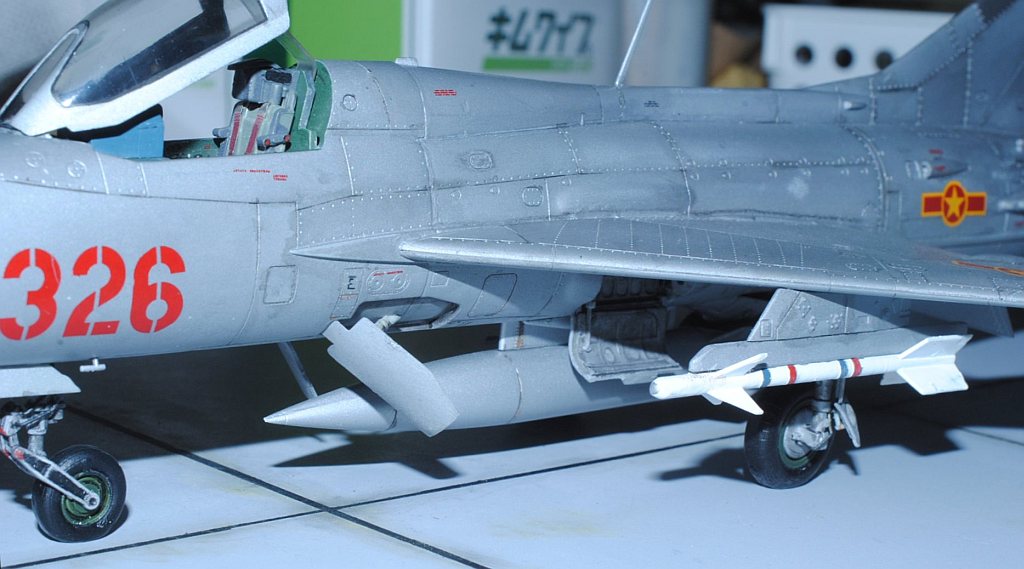
"Enlarged view of middle section ("Atoll" infrared-guided AAM, ventral drop tank, extended port forward air brake)" (Crick to enlarge).
"Diorama completed on August 31 2013" (Crick to enlarge).
"Diorama on the desk, with glasses of wine" (Crick to enlarge).
"Diorama on the desk, with glasses of wine" (Crick to enlarge).
Chronology
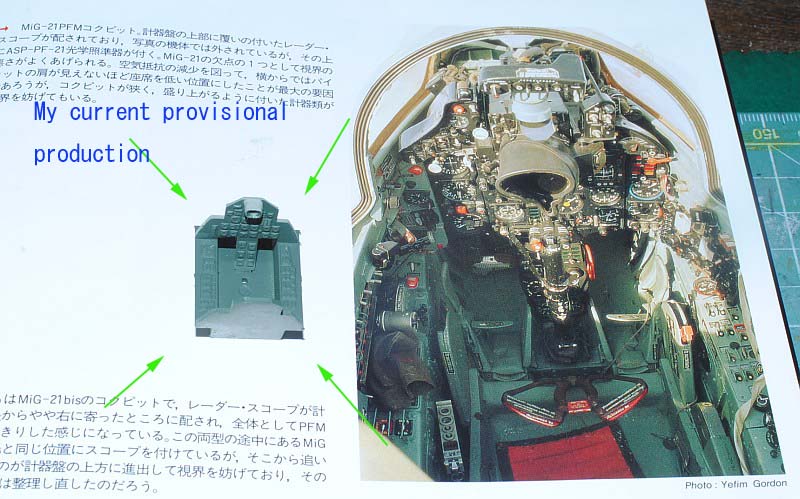
2013. 4.13. I start with painting the cockpit. The problem is the color tone of the cockpit interior. I tentatively painted as this photo's green, mixing a few Tamiya colors adding MIG Pigments Wash a bit, and using Zoukeimura Airtex2 air brush, there are several references indicating other tones, e.g., photo-1 (more bluish), and photo-2 (more bright greenish).
This week's accomplishment (Crick to enlarge).
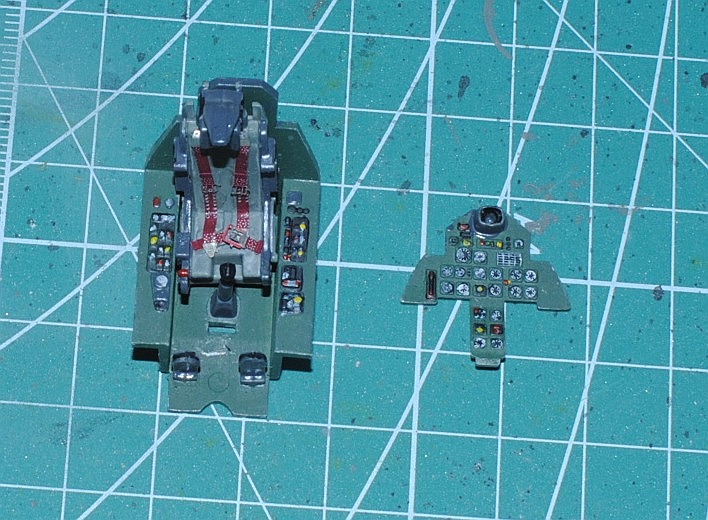
2013. 4.21. Instrumental panel and cockpit interior is painted with thin and delicate brush with Tamiya flat black, red and yellow: Photo-1: Instrument panel, Photo-2: Instrument panel and cockpit interior, Photo-3: Instrument panel, control column, rudder pedal and ejection seat glued, Photo-4: ditto, anterior view. After cockpit interior is finished, anterior fuselage section is temporarily assembled: Photo-5: ditto, posterior view, Photo-6: ditto, anterior view.
This week's accomplishment (Crick to enlarge).
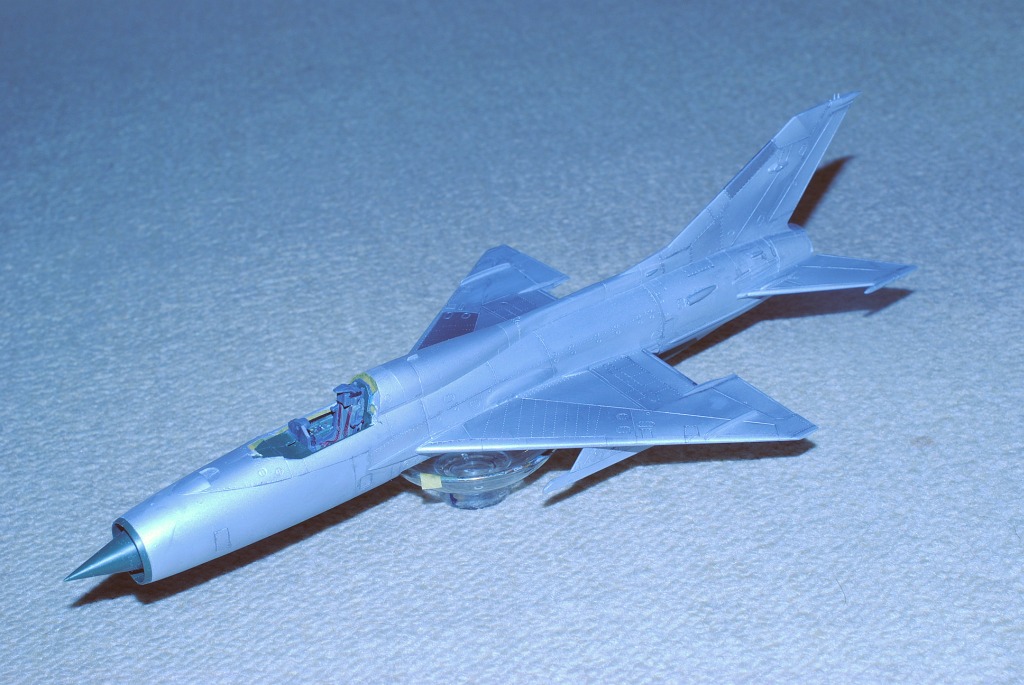
2013. 4.27.-28. Fuselage is temporarily assembled with no glue, after both faces of main wings and vertical tail plane are glued.
This week's accomplishment (Crick to enlarge).
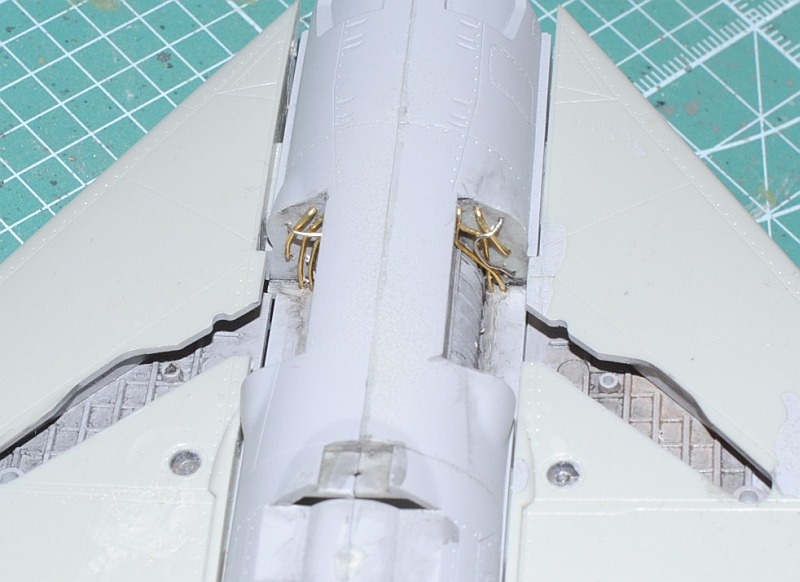
2013. 5.03.-05. Pipework and wiring was added to the main undercarriage well: Photo-1: Posterior wall of the well, Photo-2: Anterior wall of the well, using 0.4 and 0.5 mm brass line. Main wings and all-moving horizontal tail planes are glued with the fuselage, the former with 3° anhedral angle and the latter horizontal: Photo-1: Anterior view, Photo-2: Posterior view.
This week's accomplishment (Crick to enlarge).
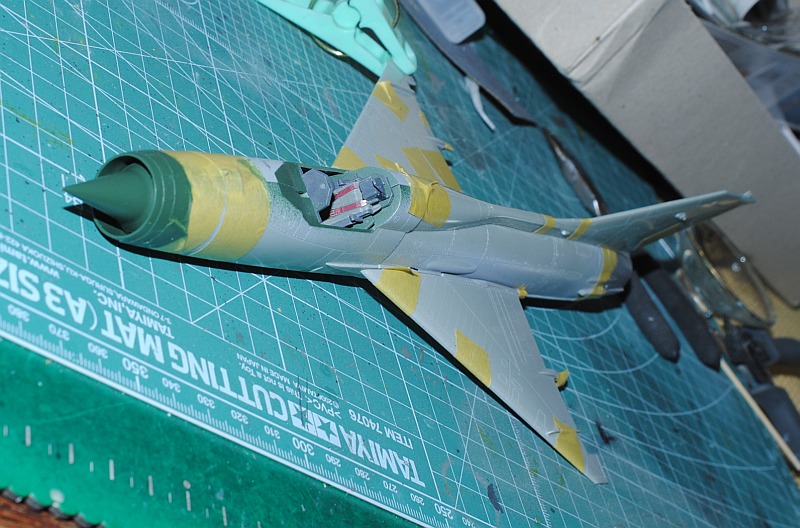
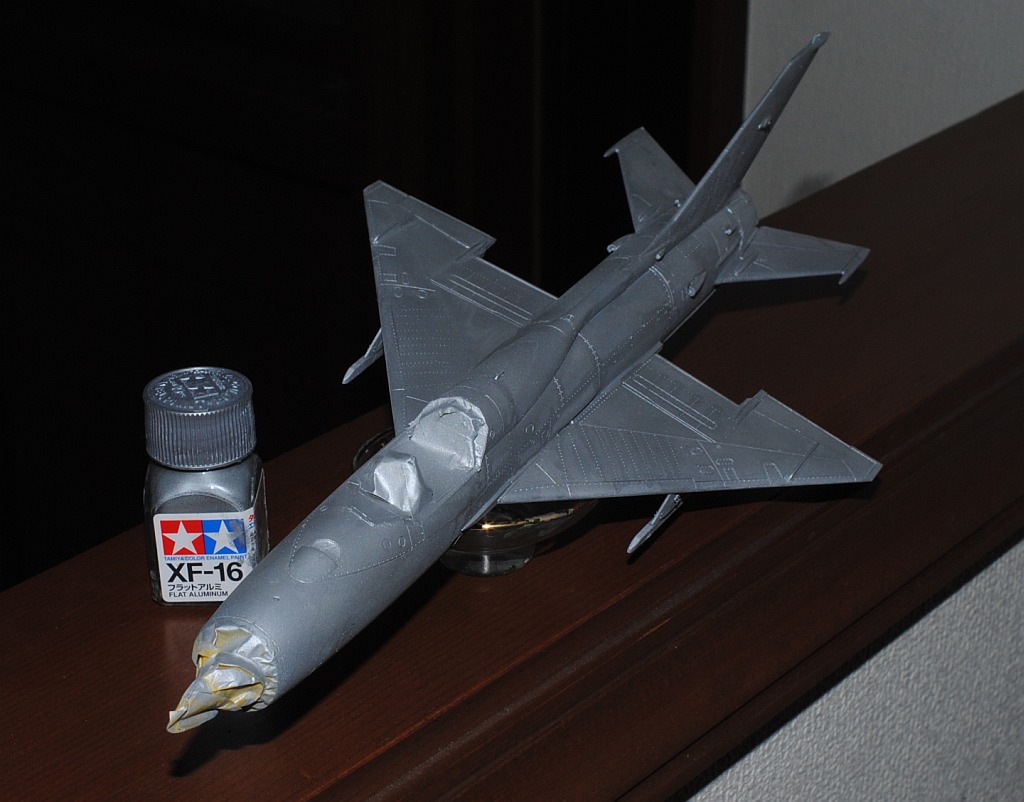
2013. 5.11-12. Antennae are planted using 0.5 mm lead line (tiny gold projections). Inboard weapon pylons are glued (red arrows, see anterior half of ventral fin is being painted dark green), and intakes on the surface of the tail fuselage are punctured using 0.5 cm and 0.7 cm pin vice. After painted parts are being masked with tape - Photo-1, Tamiya surface primer (gray) is sprayed, using cardboard box sent by Amazon.jp. Parting line is roughly traced with Tamiya's panel line accent color.Upper surface and lower surface.
This week's accomplishment (Crick to enlarge).
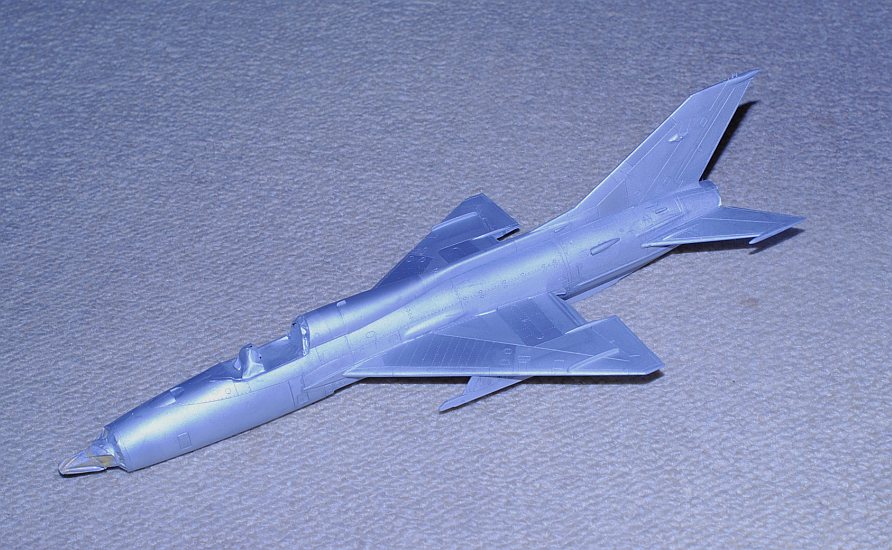
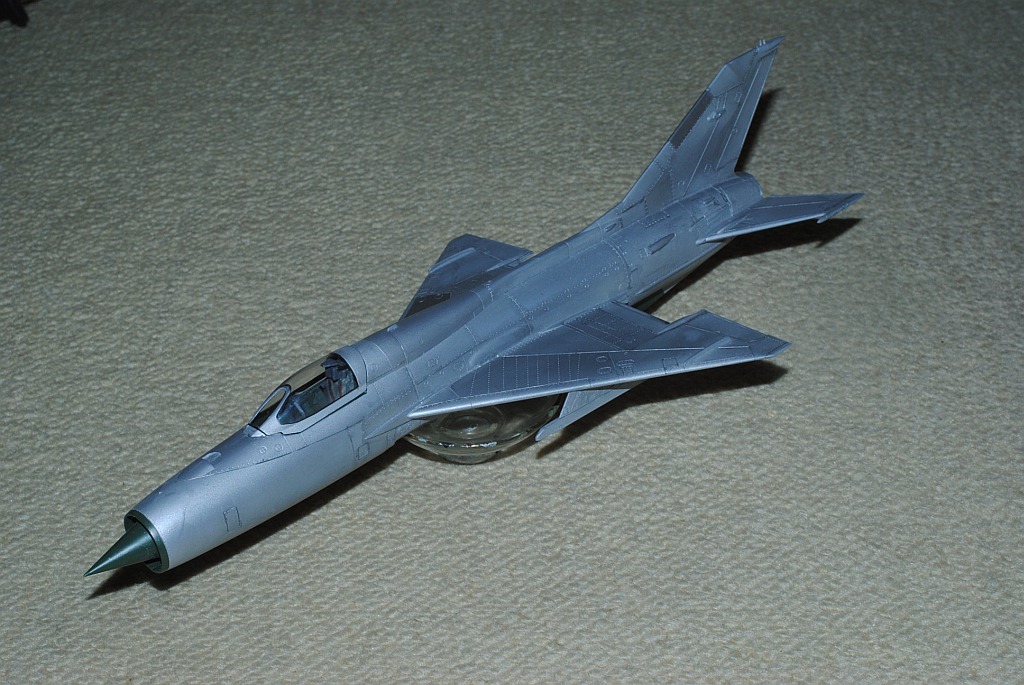
2013. 6.1. Flat silver is sprayed using Zoukeimura Airtex2 air brush. This is the first time to apply this instrument to paint wide external area. Compared with can spray, thin painting is possible it seems because of smaller paint particle.
This week's accomplishment (Crick to enlarge).
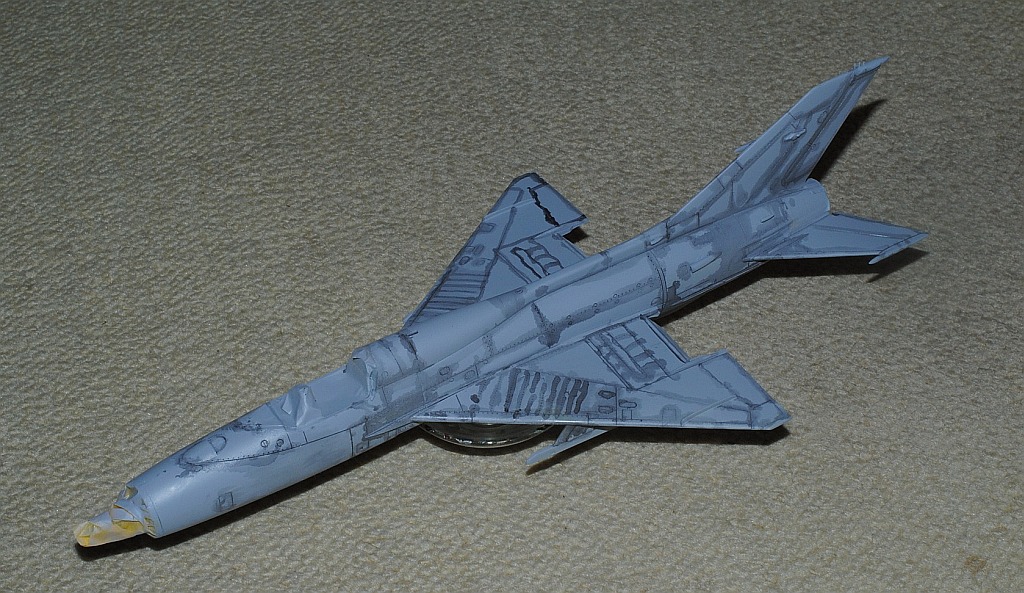
2013. 6.15. After consulting the reference books, the selected panels are masked with tape patiently. Then, dark-toned silver is sprayed (Tamiya flat aluminium + gross silver + dark gray with Zoukeimura Airtex2 air brush), and tapes detached.
This week's accomplishment (Crick to enlarge).
2013. 6.22-23. First trial of silver shading is a bit mild, I sprayed add-on dark silver, side-view. Then, I traced parting lines with Tamiya weathering master.
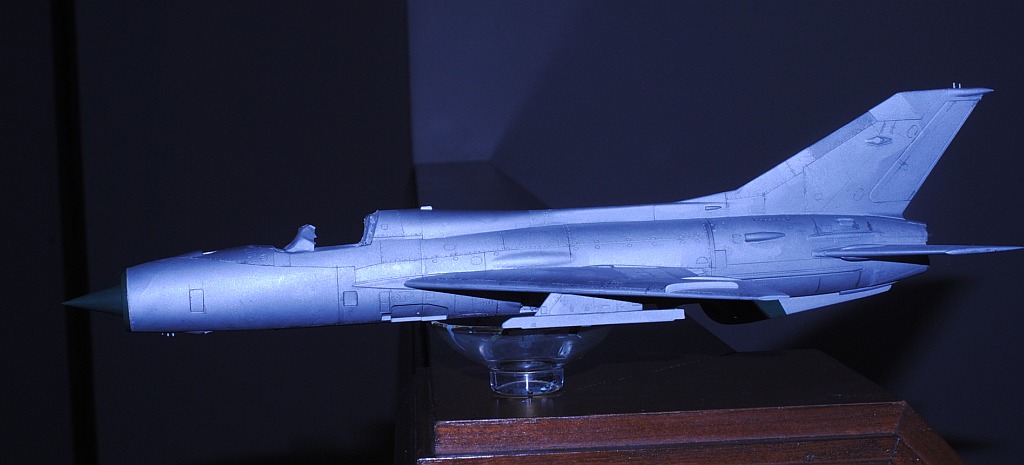
This week's accomplishment (Crick to enlarge).
2013. 7.5-6.Panel line accentuation was a bit overkill, I wipe off the weathering a bit.
This week's accomplishment (Crick to enlarge).
2013. 7.13-15. Frame of the canopy is painted, using eduard's "Die-Cut Flexible Mask". Actually, it takes a bit of serious speculation for me to understand eduard's design. As a first step, interior rubber color is sprayed, after a bit narrow area is masked with tape and masking liquid to include the area for the black rim around the transparent glass, then sprayed in black, with wheels. After the first-stage masks are peeled off, second-stage masking is done, covering the black rim. The point is this, to superimpose by the tape the black rubber rim that have been sprayed in the first stage. After flat silver is sprayed for external color and all the masking is peeled off, the beautiful capopy emerges. Looking good in the trial assembly with no glue.

This week's accomplishment (Crick to enlarge).
This week's accomplishment (Crick to enlarge).
2013. 7.19-21. Nosewheel leg and shock absorbers are assembled and weathered. Details are grasped with this photograph from reference 3 - East Germany's MiG-21bis (take note of red dots), and followed by trial assembly.
This week's accomplishment (Crick to enlarge).
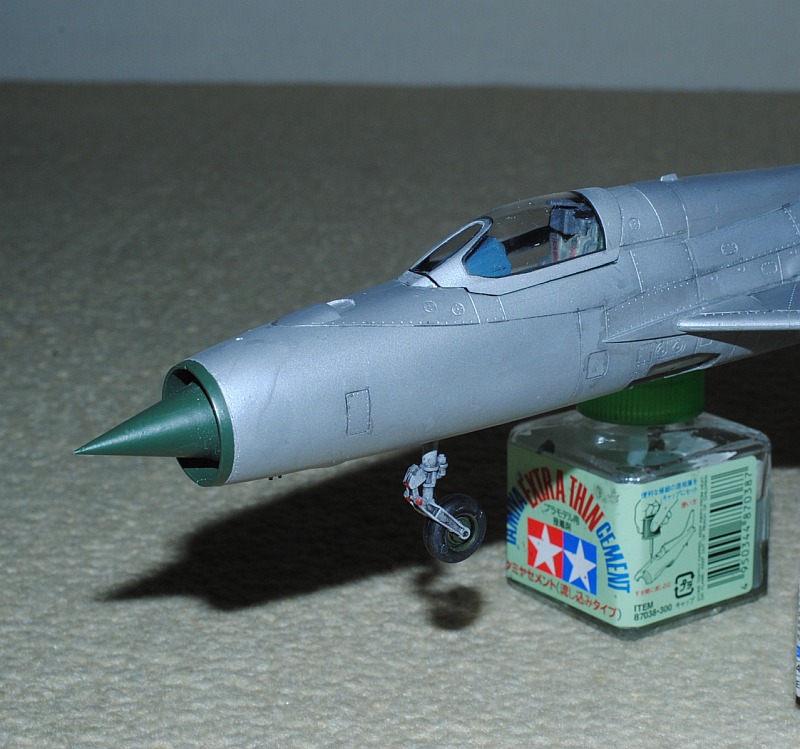
2013. 7.26-28. Painstaking for nosewheel and mainwheel legs continues. After details are grasped with this photograph from reference 3 - MiG-21F (take note of thick piping on the left side), piping and wiring was done to the undercarriages. These legs are temporarily assembled to the fuselage (side view, and ventral view). I am not impressed with original tyre parts which are simply molded in circle, so I retrofit them into deformed shape due to compression by gravity as was done to Spitfire Mk.I. Firstly the base is trimmed with sand paper, then roughly swelled laterally with putty, and brushed with Tamiya surface primer, then painted in black (deformed shape of tyres accomplished). They are finally glued to each bay of the fuselage, (ventral view, and anterolateral view).
This week's accomplishment (Crick to enlarge).
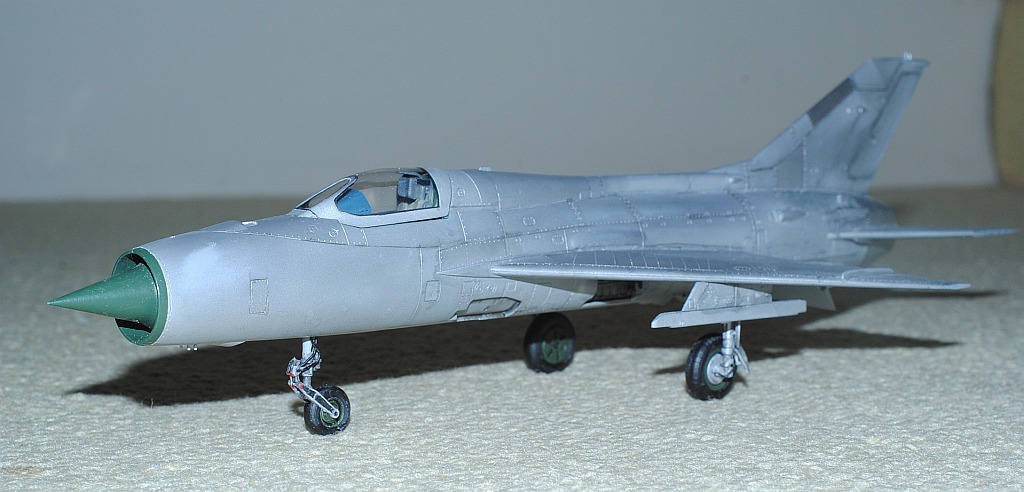
2013. 8.2-3. Ventral and forward air brake are carefully configured. As reference 3 indicates, four rounded holes are being punched to the ventral air brake (blue arrows), I bore the holes using 1.0 mm and 0.7 mm pin vice (red arrows) - Posteroinferior view of glued ventral (blue arrows) and forward air brakes (red arrows), and ground figure.
This week's accomplishment (Crick to enlarge).
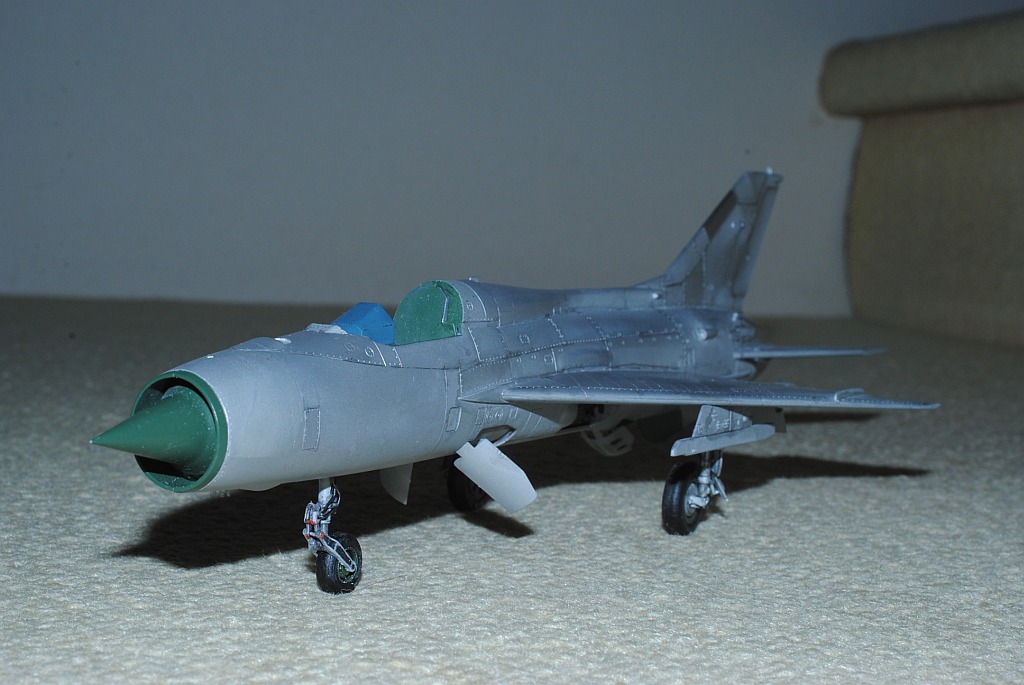
2013. 8.9-11. Semifinal assembly is done to cement antennas and Pitot tube, etc. Undercarriage retraction struts are added to the mainwheel legs, with inboard doors and nosewheel doors, and Pitot boom, dynamic pressure probe, dorsal antenna, etc, are glued.
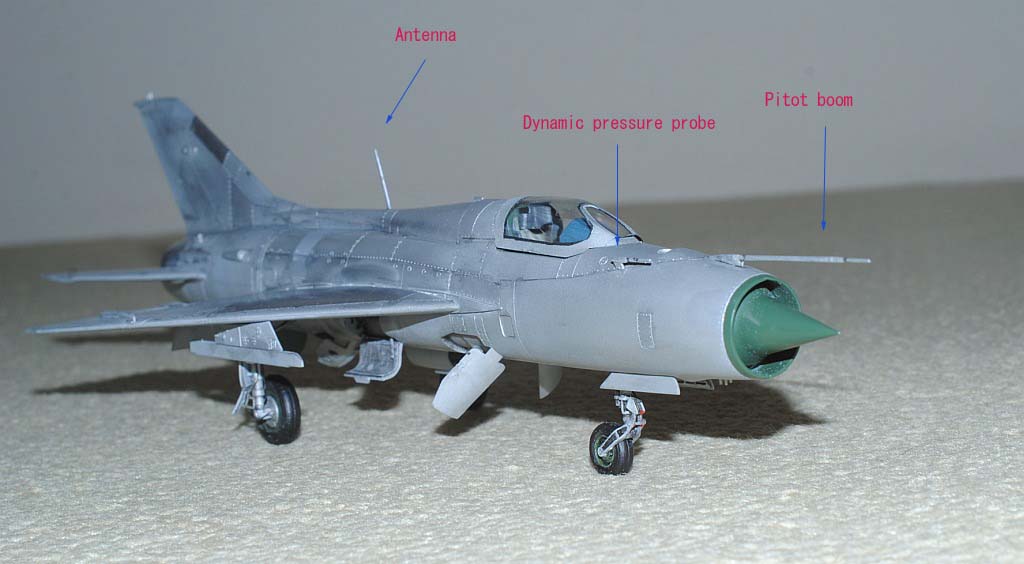
This week's accomplishment (Crick to enlarge).
2013. 8.16.-18. IFF antennae are re-built, with 0.5mm brass line. "Atoll" infrared-guided AAM are painted in white and glued to the weapns pylon, and auxillary ventral drop tank in silver to the fuselage, ditto in enlarged view. After wheels are painted again with black coat and all decals are applied with use of Mark Fit solution, whole surface is sprayed with Mr Hobby's half-flat topcoat for preservation of delicate decals: Photo-1, Photo-2. Although I am advancing these process with extreme care, I notice now that I lost the dynamic pressure probe for q-feel on the anterior right side of the canopy, Ouch! I must build the missing one from scratch with plastic and brass lead, Aghaaaaaa, weep, but never give up.
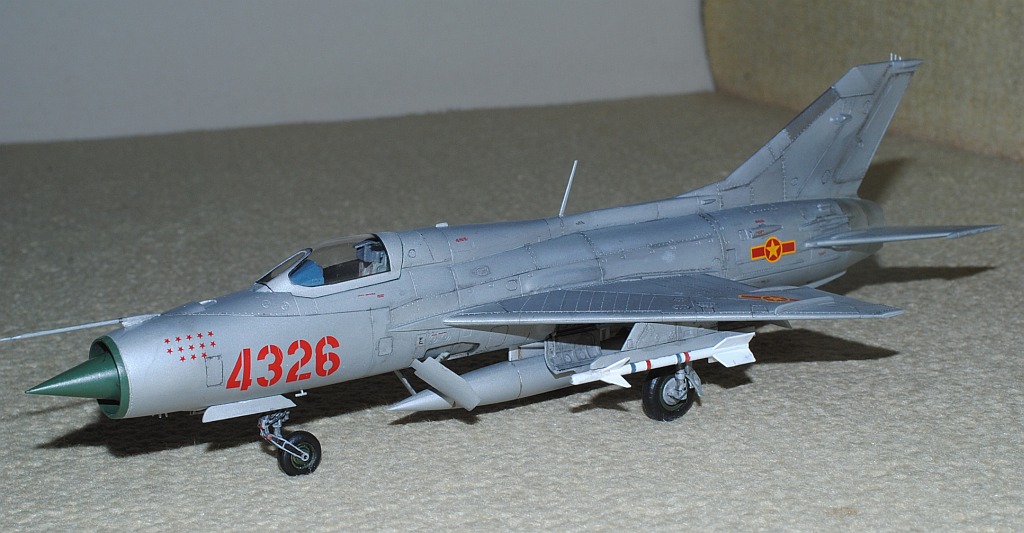
This week's accomplishment (Crick to enlarge).
2013. 8.30.-31. I make dynamic pressure probe for q-feel scratch from not brass but white metal (albata) line and thin plastic plate with instant adhesive -Photo-1, Photo-2. Now, I seem to declare mission accomplished.
This week's accomplishment (Crick to enlarge).
References:
1. Braybrook R, Skrynnikov S and Yakutin L. Russian Warriors - Sukhois, MiGs and Tupolevs. Osprey Military Aircraft (1993, ISBN-13: 978-1855322936)
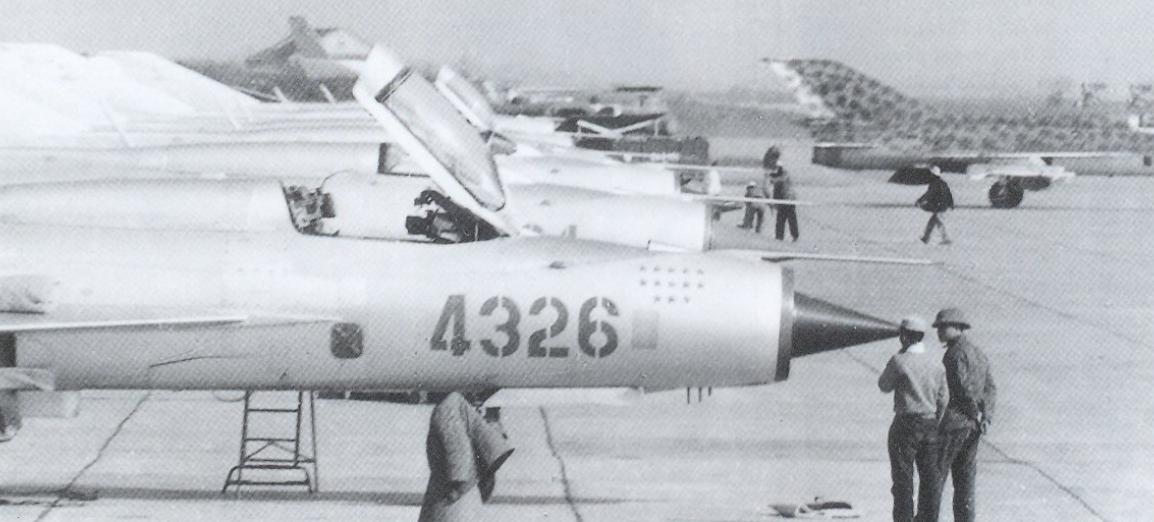
2. Toperczer I, Styling M. MiG-21 Units of the Vietnam War (Combat Aircraft). Osprey Publishing (2001, ISBN-10: 1841762636) (My book review).
3. MiG-21 "Fishbed" Famous Aircraft of the World No.76 (in Japanese). Bunrindo, Japan (1999, ISBN-13: 978-4893190734).
4. Palaque G, McKay A . The MiG 21: The Mikoyan-gurevitch Fishbed (1955-2010) (Planes and Pilots) . Histoire & Collections, France (2010, ISBN-13: 978-2352501473).
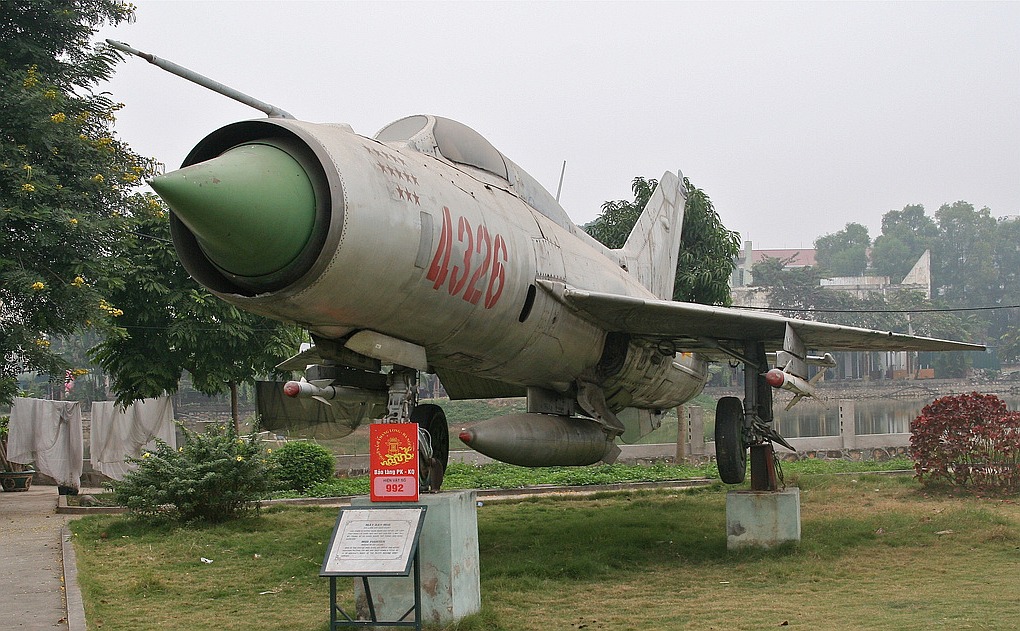
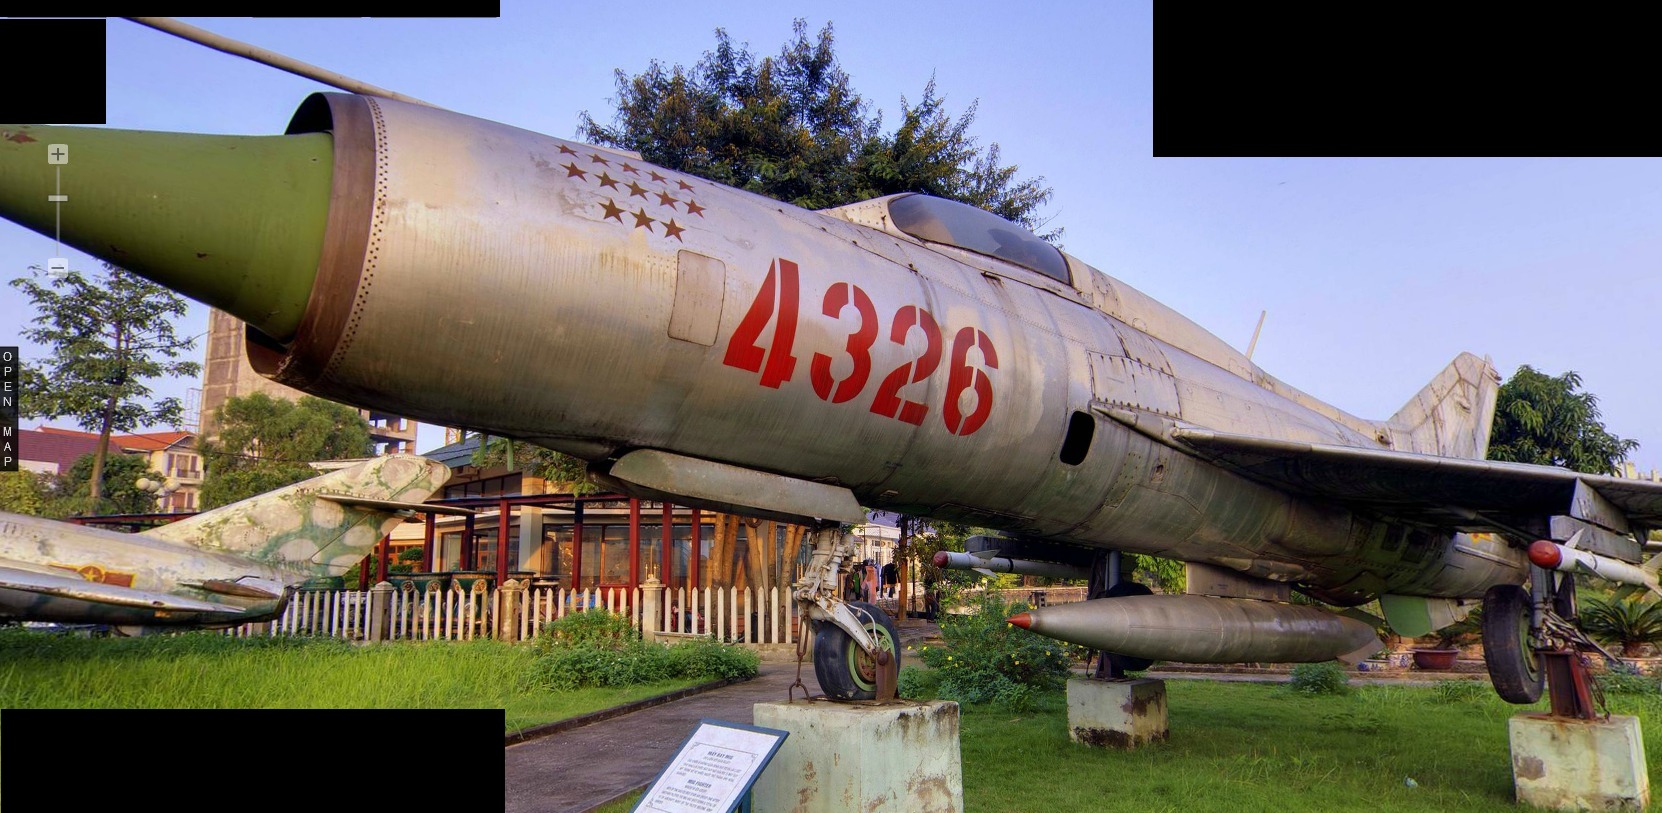
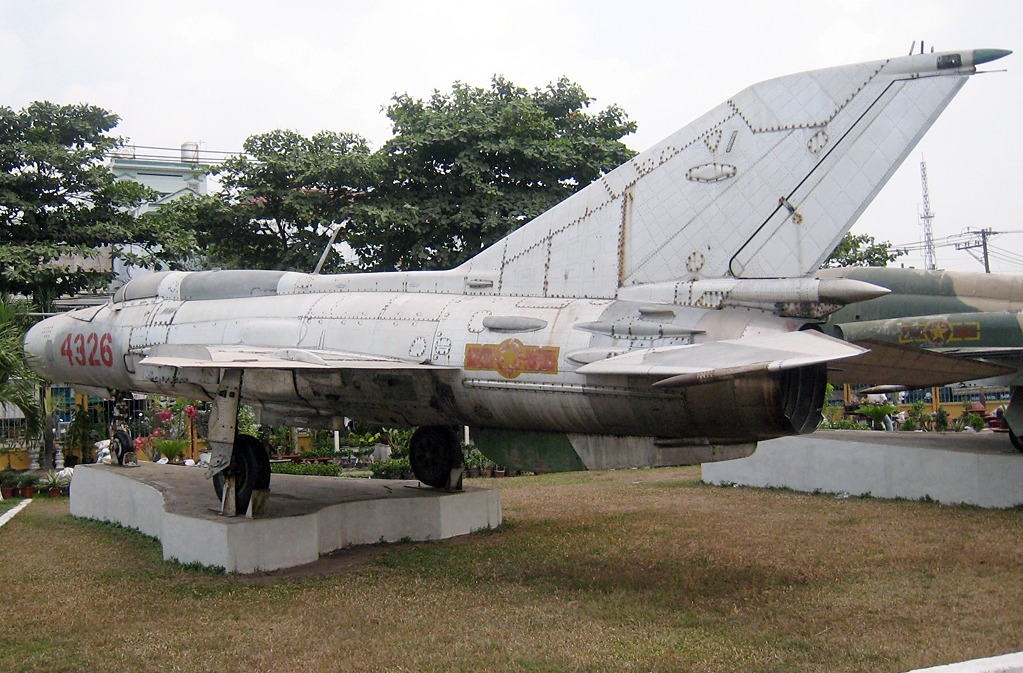
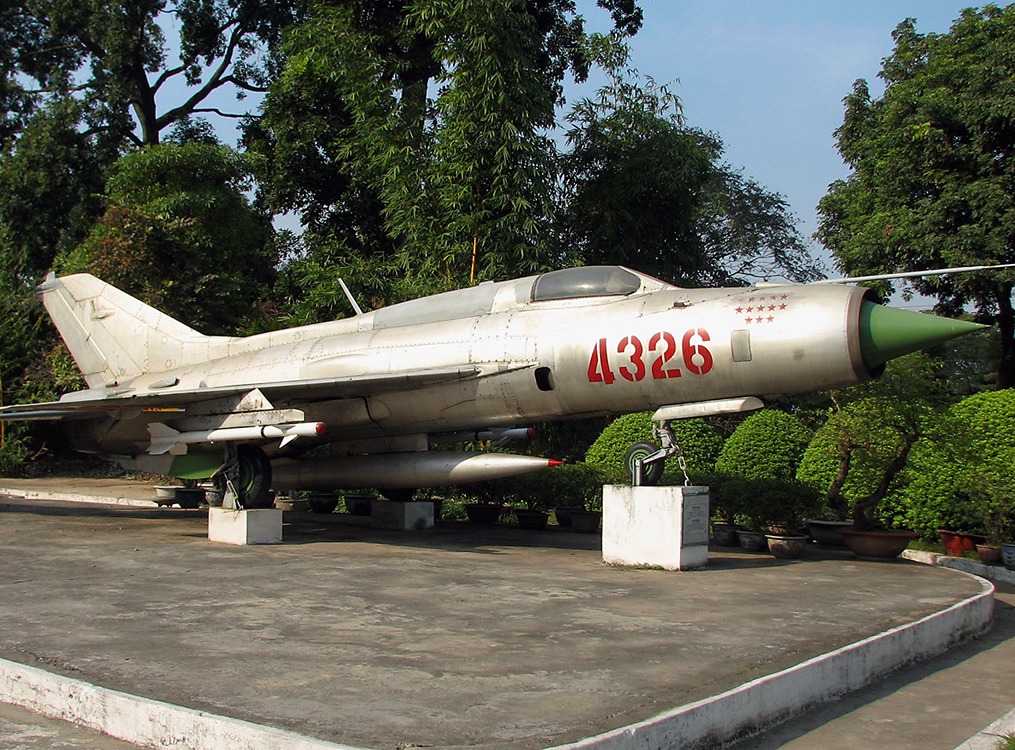
Images collected on the net:
Back to "Scale Model Hobby" Index Page
DISCLAIMER: The views expressed here are those of the author Akio Hasegawa and do not reflect the official policy of any institutions in Japan. I have no finantial interests regarding this project. Citations of trade names do not constitute an endorsement of the products. Feedback is, as always, encouraged.
Please send your comments to akio-h@fg-khn.jp
Back to previous Home Page at AOL (Till October 31 2008)
Back to previous Home Page at geocities.jp web host (Till March 31 2019)
Back to New Home Page (Translocated Sakura server)
Version 1.00. 2013.9.1.