Dassault Etendard IV M
with Flottille 11F
on the French aircraft carrier Clemenceau in 1964
(Heller 1/48)
by Akio Hasegawa, M.D.
(To view the images, click the underlined phrases, and to return to this page,
click RETURN key on the toolbar of your browser
All pictures here are shot by me, a seasoned-pathologist, with digital SLR Nikon D3000 Serial #2001042 with old Nikkor-S 35mm 1:2.8 Serial #380104, i.e., manual focus/manual exposure)

(Crick for English description)
This site is licensed under a Creative Commons License.
(Crick for Japanese description)
During my junior high school years in Okazaki City of Aichi Prefecture, I went to a cinema singly to view "Le Ciel sur la tete (1964)" starring by aircraft carrier Clemenceau, Dassault Etendard IV M, Breguet Alize. Up till the 3rd year of high school at age 18, I had a hope to become an aircraft engineer as my late father Tatsuo. I still remember the deep impressoin by the sharp silhouette of this aircraft. Actually, I abandoned the aspiration to be aircraft engineer, and changed my course to medical doctor.
I lately find out Heller's 1/48 scale model at Akihabara's specialized shop.
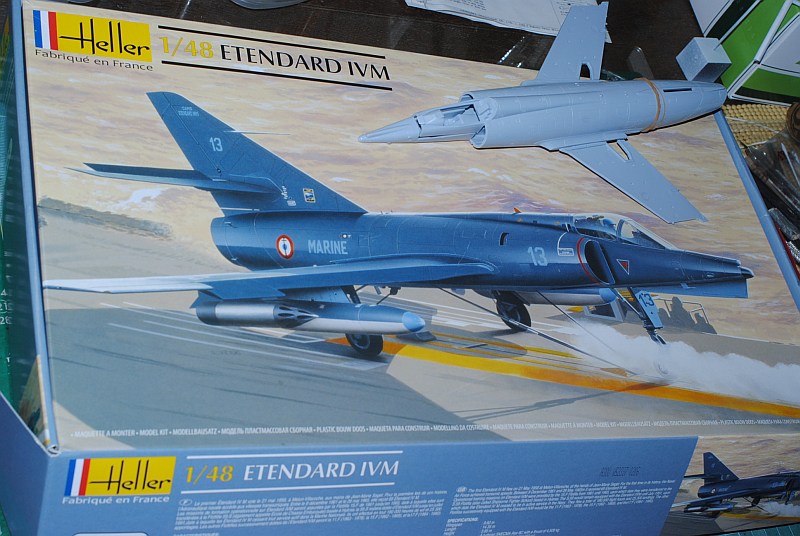
Heller's 1/48 scale model (Crick to enlarge).
Completed Images (with crew figures)
* Using "Hasegawa US Pilot/Ground Crew Set: B (X48-5)" (Disclaimer: I have no genetic and financial relationship to this same-name company)
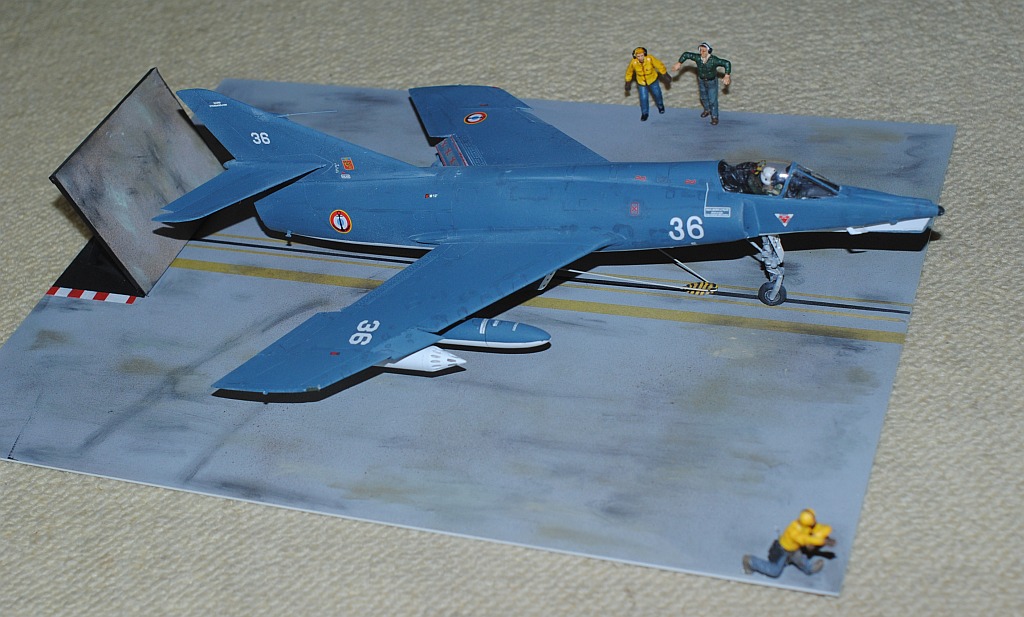
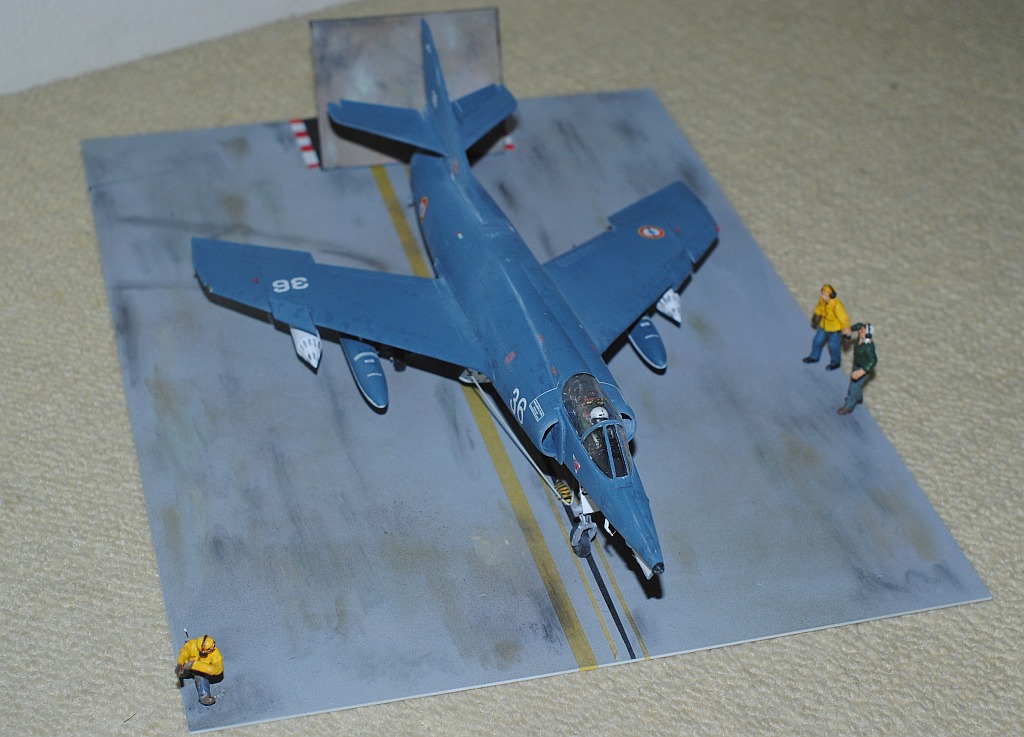
Dassault Etendard IV M on the flight deck of Aircraft Carrier Clemenceau in the summer of 1964 (Crick to enlarge),
with Flottille 11F (flotilla)
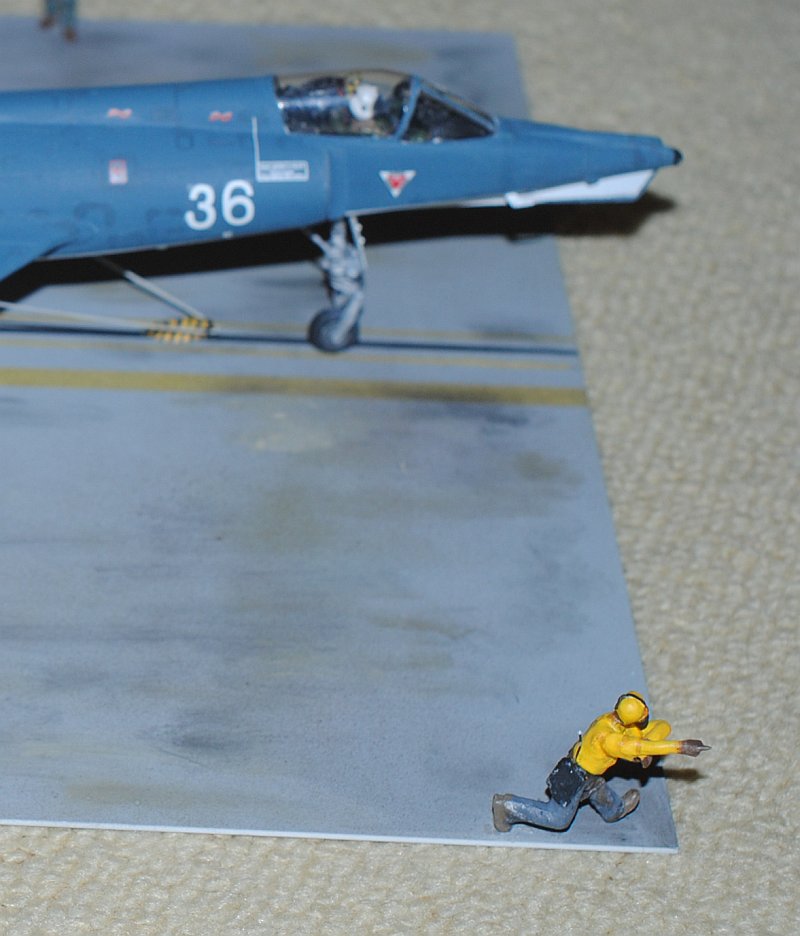
Crew enlarged (Crick to enlarge).
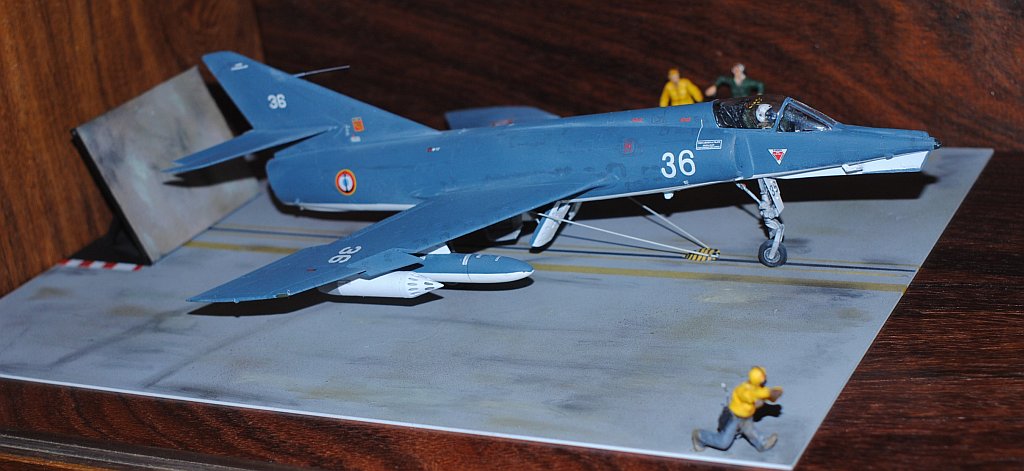
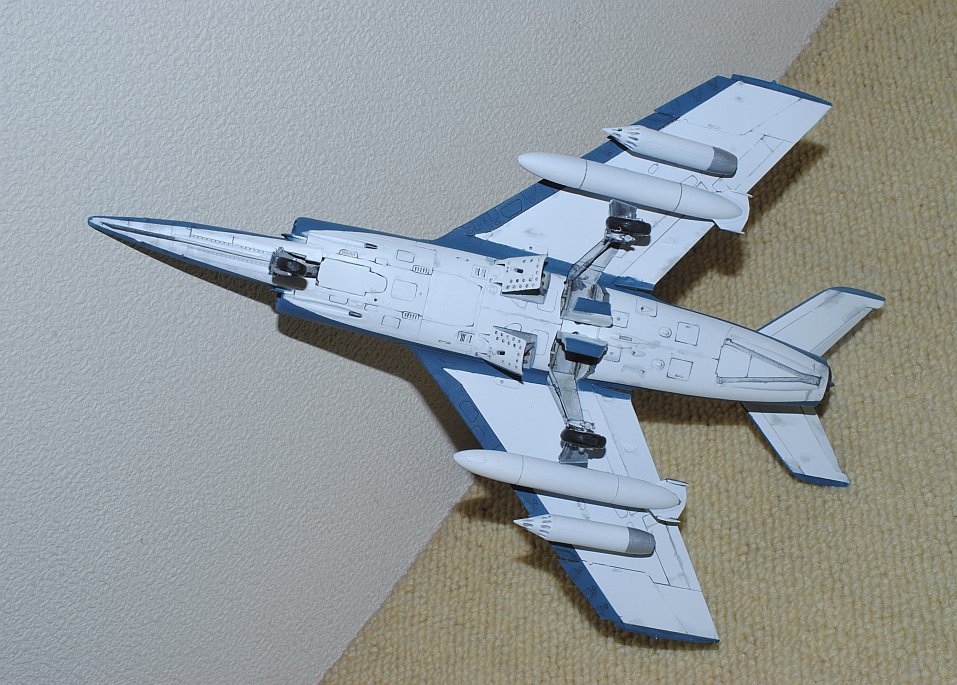
Dassault Etendard IV M on the flight deck of Aircraft Carrier Clemenceau in the summer of 1964 (in the show case) (Crick to enlarge).
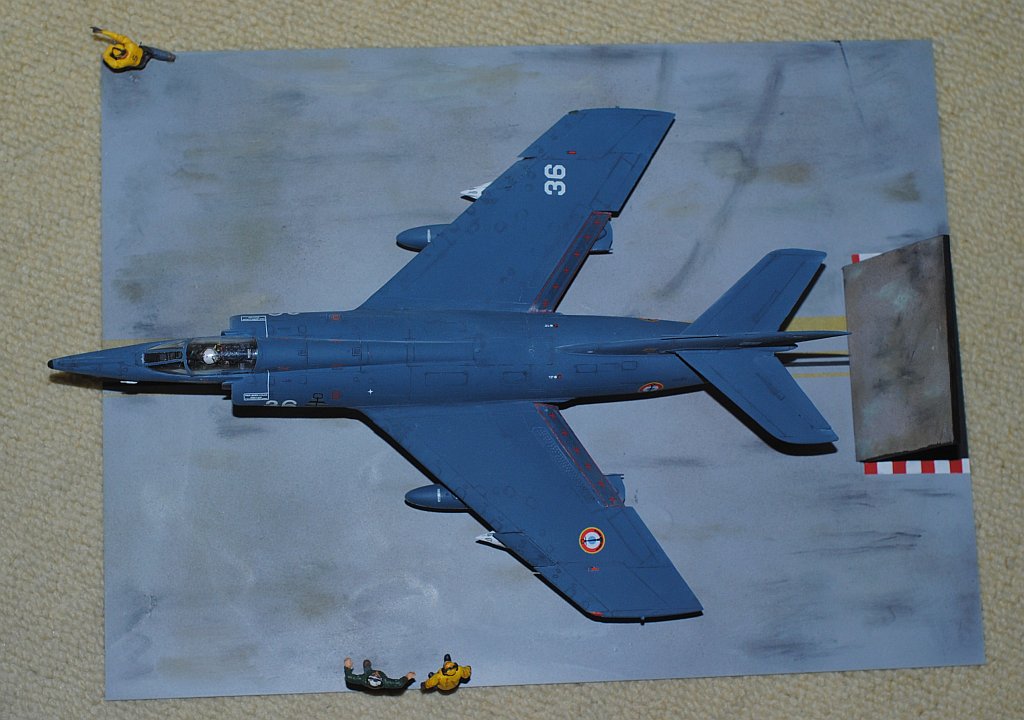
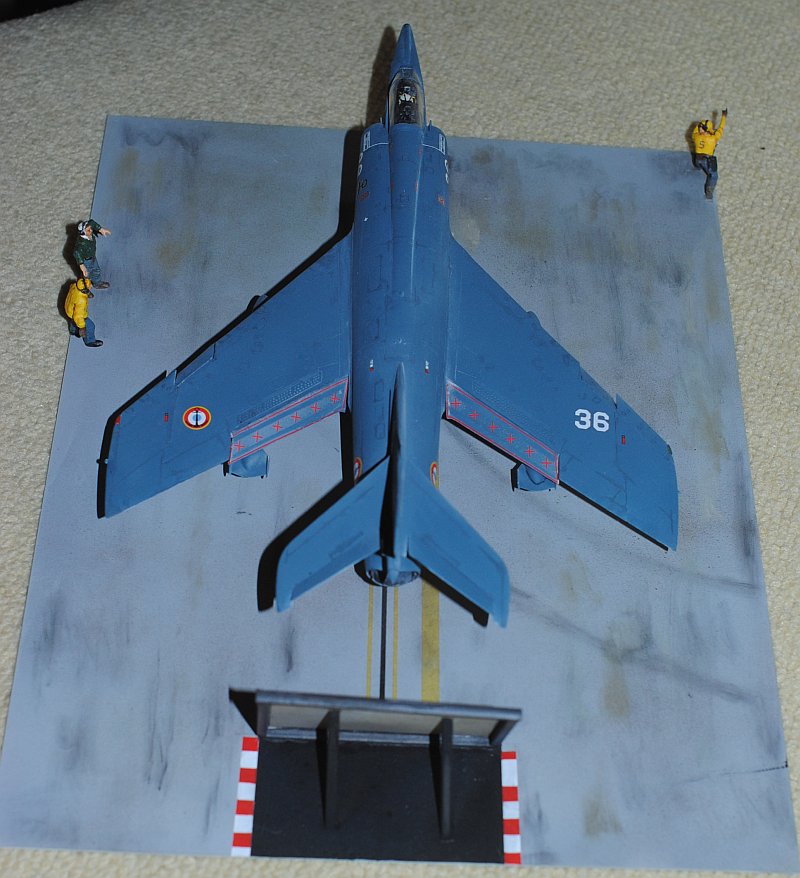
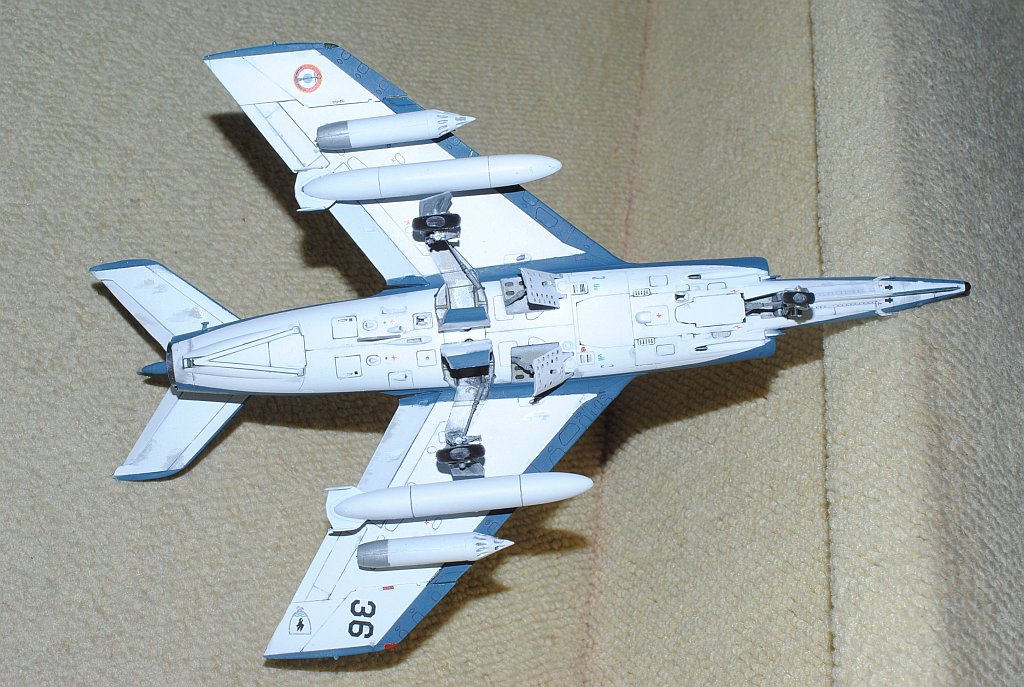
Ditto (Upper view) (Crick to enlarge).
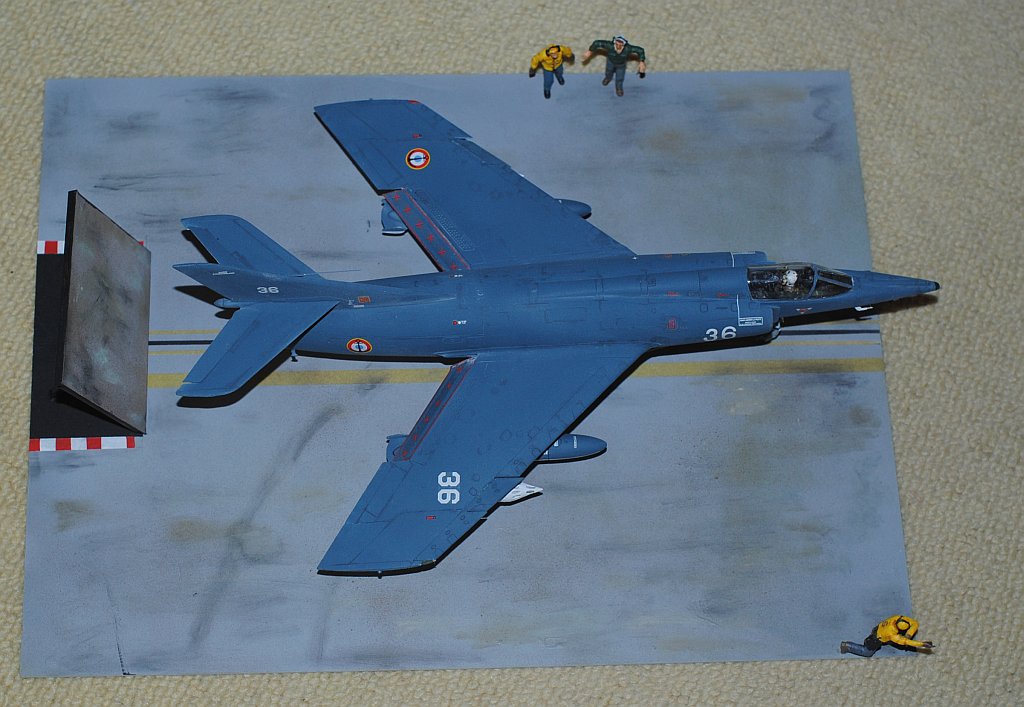
Ditto (Upper view) (Crick to enlarge).
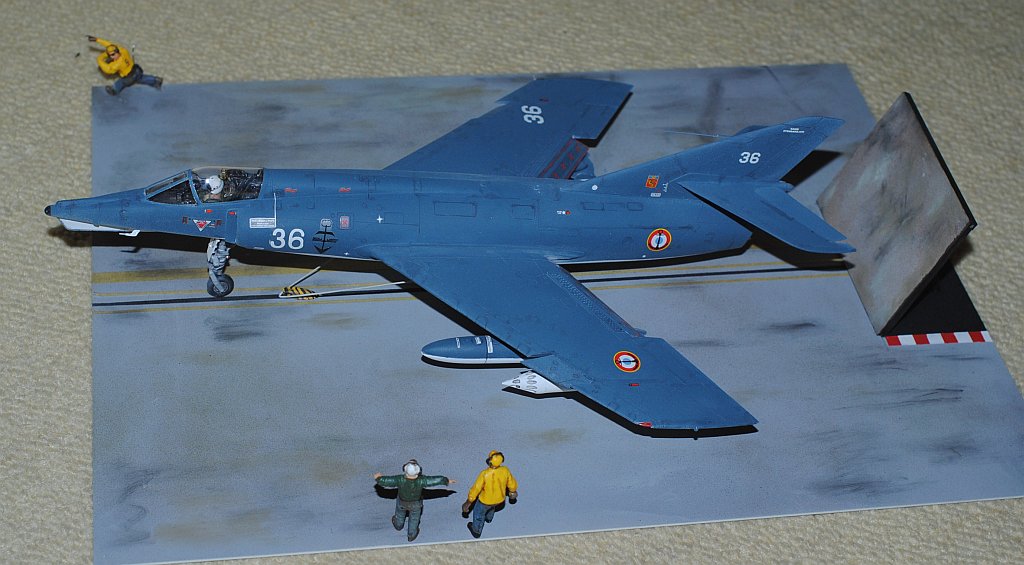
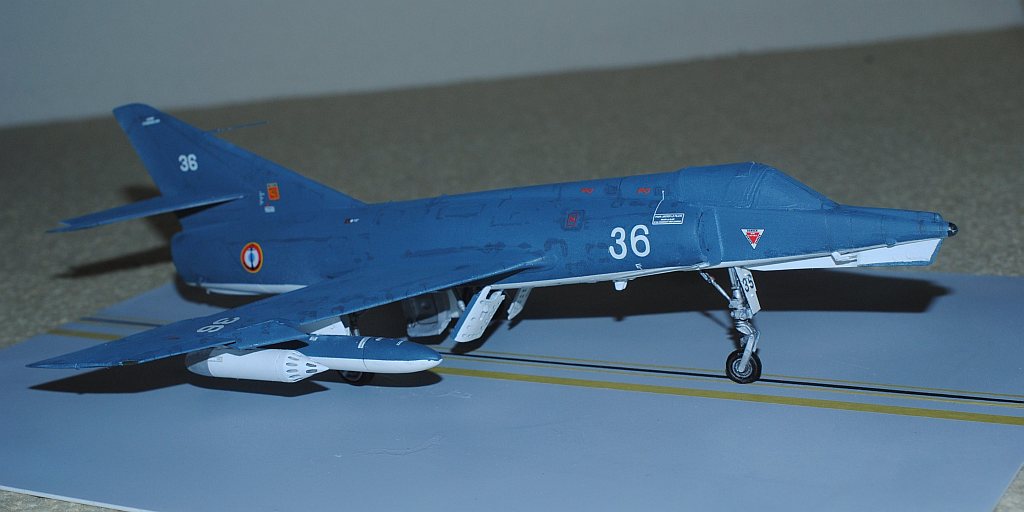
Ditto (Left side view) (Crick to enlarge).
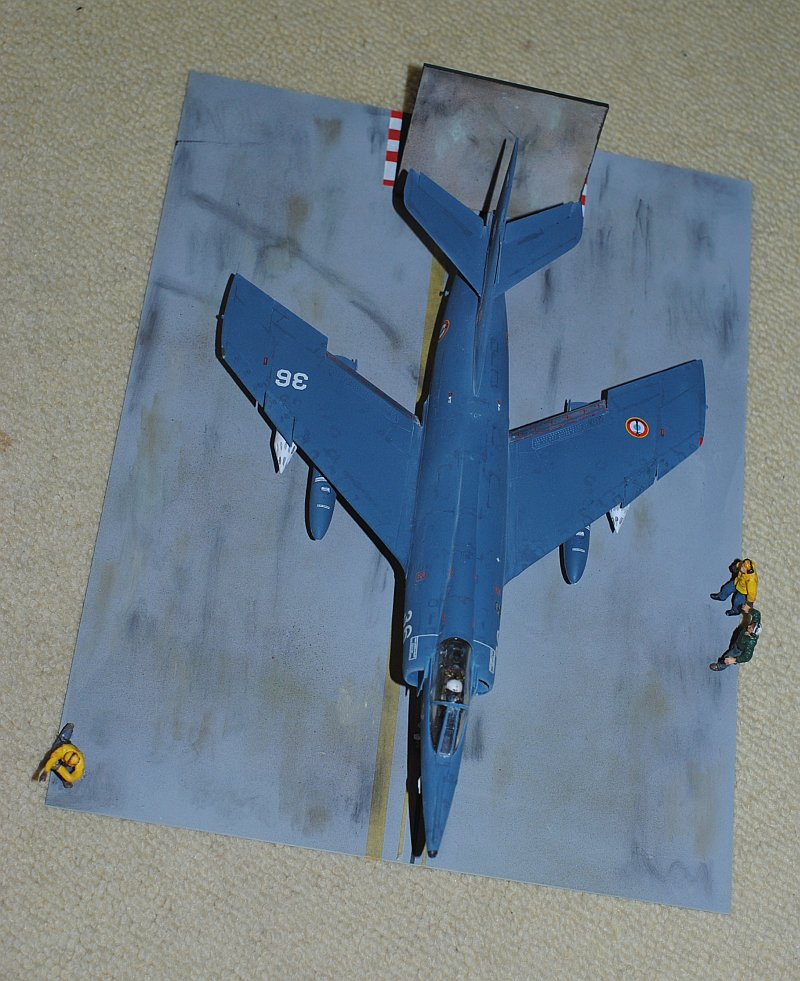
Ditto (Anterior view) (Crick to enlarge).
Ditto (Anterior view) (Crick to enlarge).
Ditto (Posterior view) (Crick to enlarge).
Chronology
2014.2.8. Outline and dimensions of the kit is checked out with the reference drawing (Reference No.4 Photo-4 indicated below), which was adjusted to 1/48 using Xerox copying instrument with its magnification function.
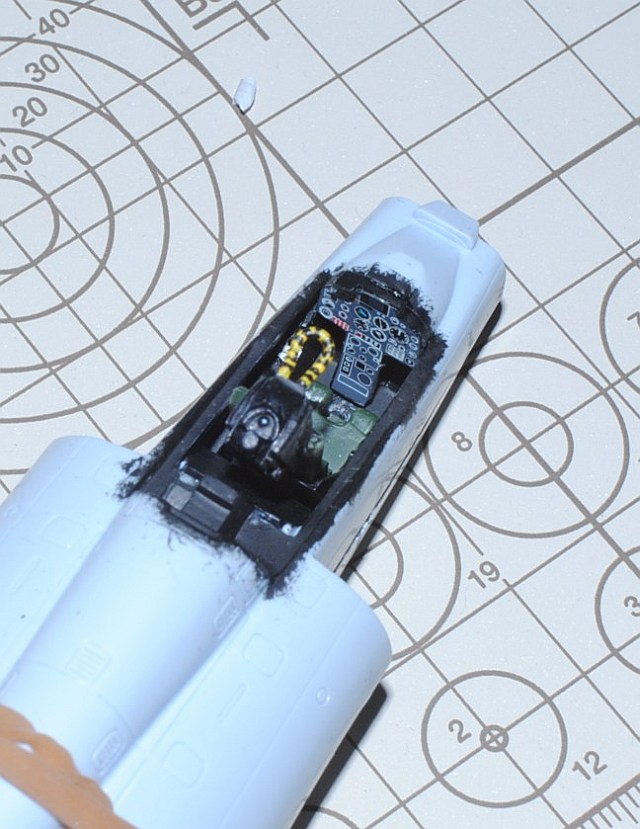
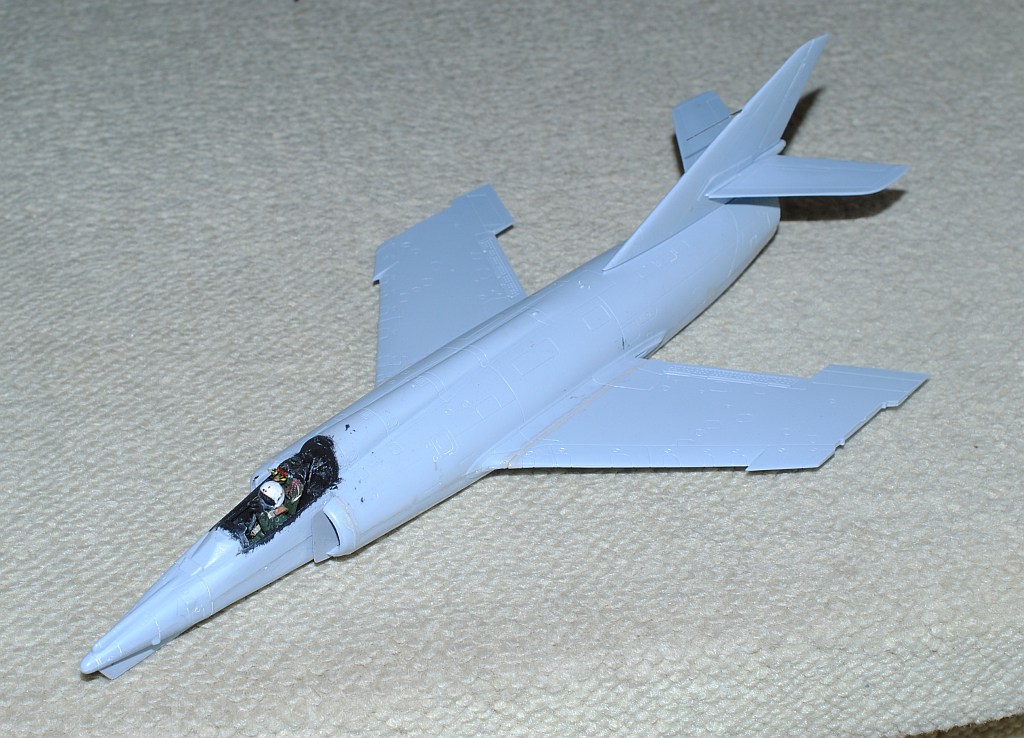
2014.2.28.-3.1. Cockpit is painted with decal being applied and ejection seat firing handle painted with thin brush (yellow and black) - Photo-1, Photo-2. Wheel wells are painted silver (this is French way) with wheathering touch - Photo-3.
This weekend's achievement
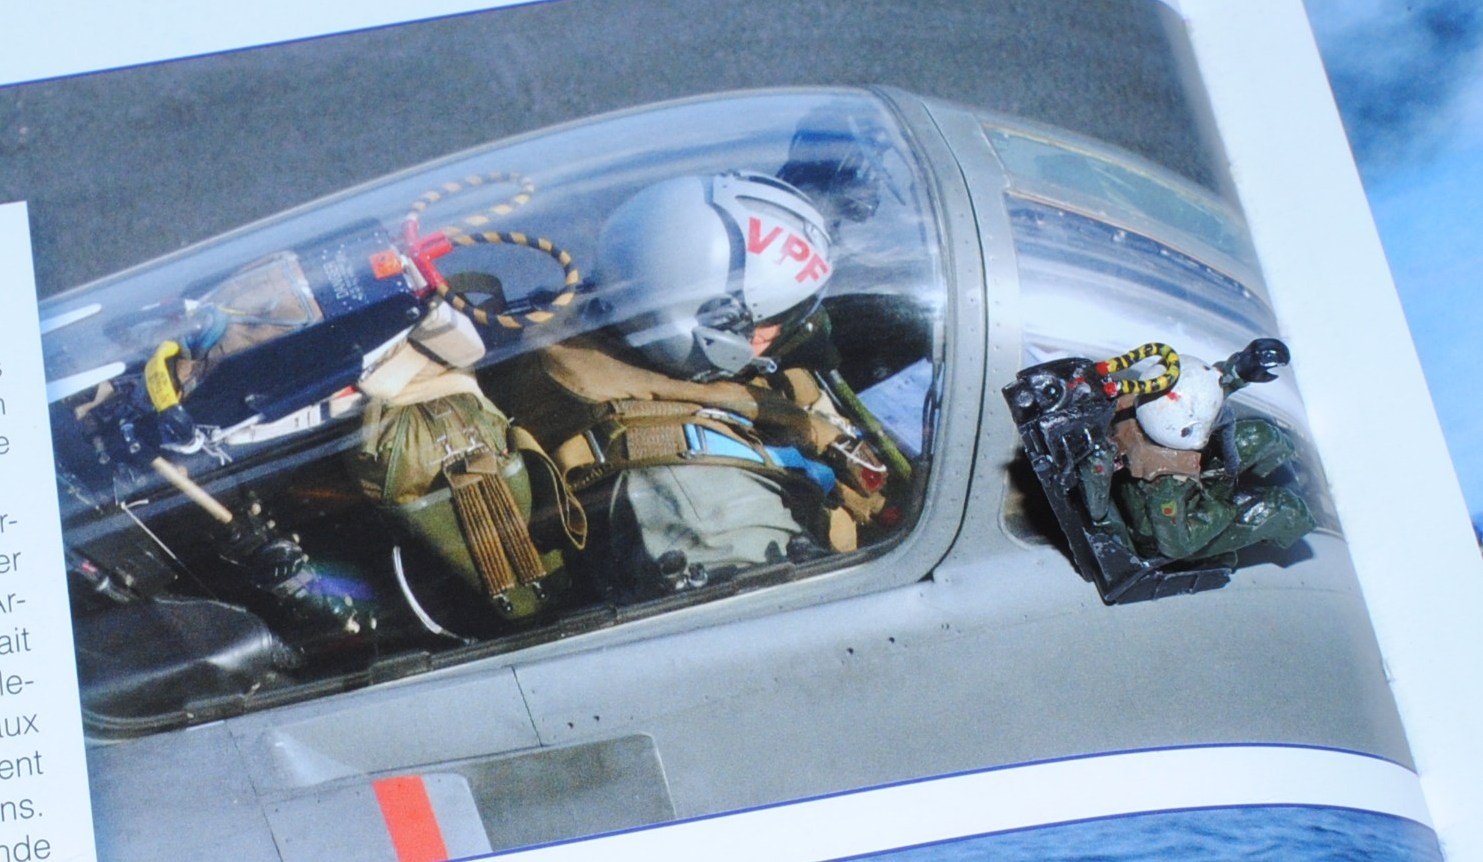
2014.3.7.-3.8. Images of the internal view of the cockpit is very scarce of this aircraft, though, this is rare one which is very informative (from reference # 1) - backward view of the seat Photo-1. Using brass wire of 0.3mm and 0.5mm diameter (gold), I installed these piping and wiring (pink arrows), using pin vice - Photo-2, Photo-3. Similarly piping in the main undercarriage well is installed (0.3mm brass line) - Photo-4.
Piping is painted flat black, with wheathering with flat sliver- Photo-5, Photo-6 (please compare with Photo-2 of 2.28.-3.1.) Pilot is temporarily on the seat - Photo-7. Seatbelts are add-on eduard kit as usual.
This weekend's achievement
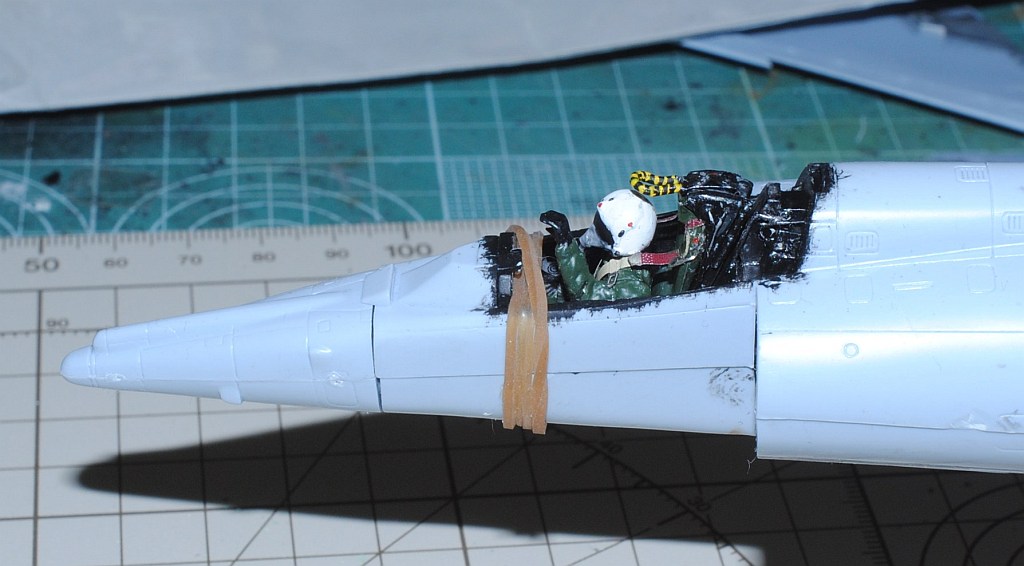
2014.3.15. Pilot and cockpit is being shaped up, with addition of life vest on the shouler and neck, and spraying mat clear - Photo-1 (Life vest made of paper, with brush painting), Photo-2, Photo-3 (Image of real pilot on Super Etendard, from reference # 1), Photo-4, Photo-5.
This weekend's achievement
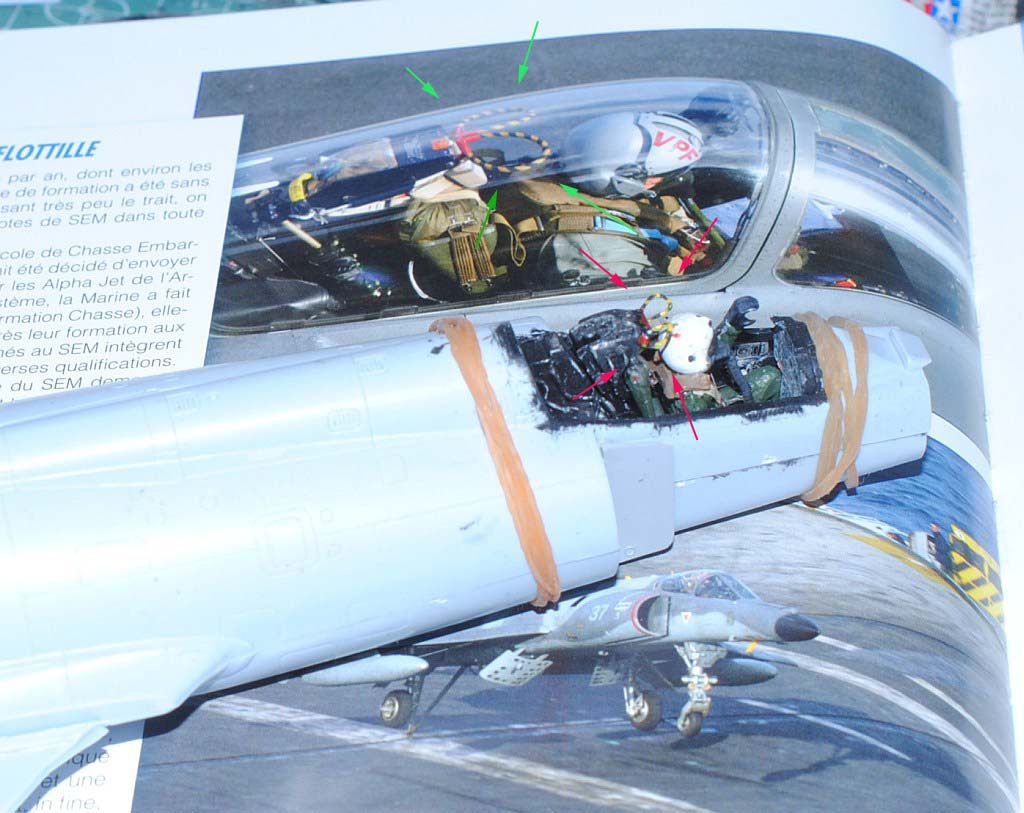
2014.3.22. As the firing handles of the ejection seat (yellow and black) is obviously thick compared with image of the real one, I cut it and remake with 0.3mm brass line - Photo-1, Photo-2, Photo-3 (Comparing the model with the real one (green arrows) - red arrows: this model), Photo-4 (upper view).
This weekend's achievement
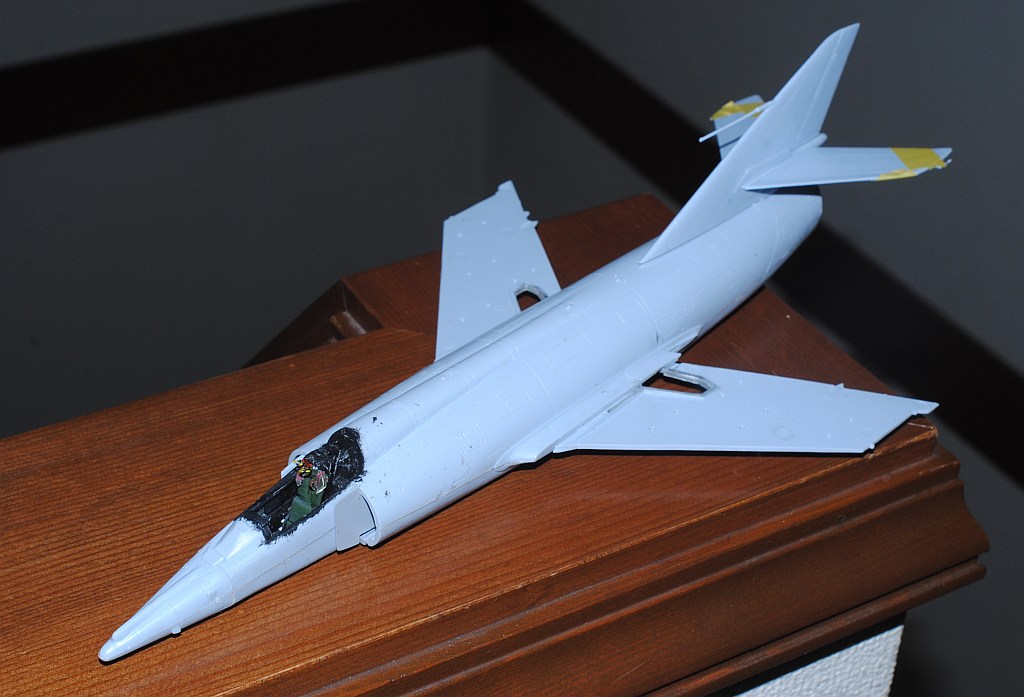
2014.3.29. Dorsal and ventral fuselage parts are glued - Photo-1, Photo-2. Since pitot tube is too thick and unrealistic, I will correct this with injection needle and brass line later Photo-3.
This weekend's achievement
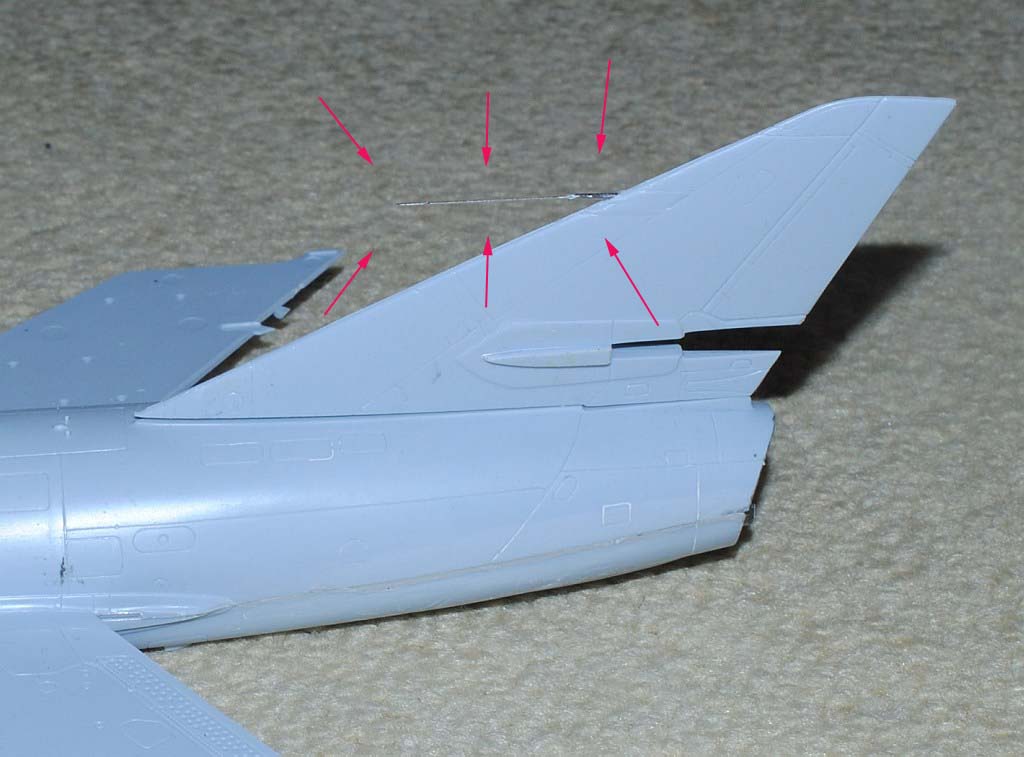
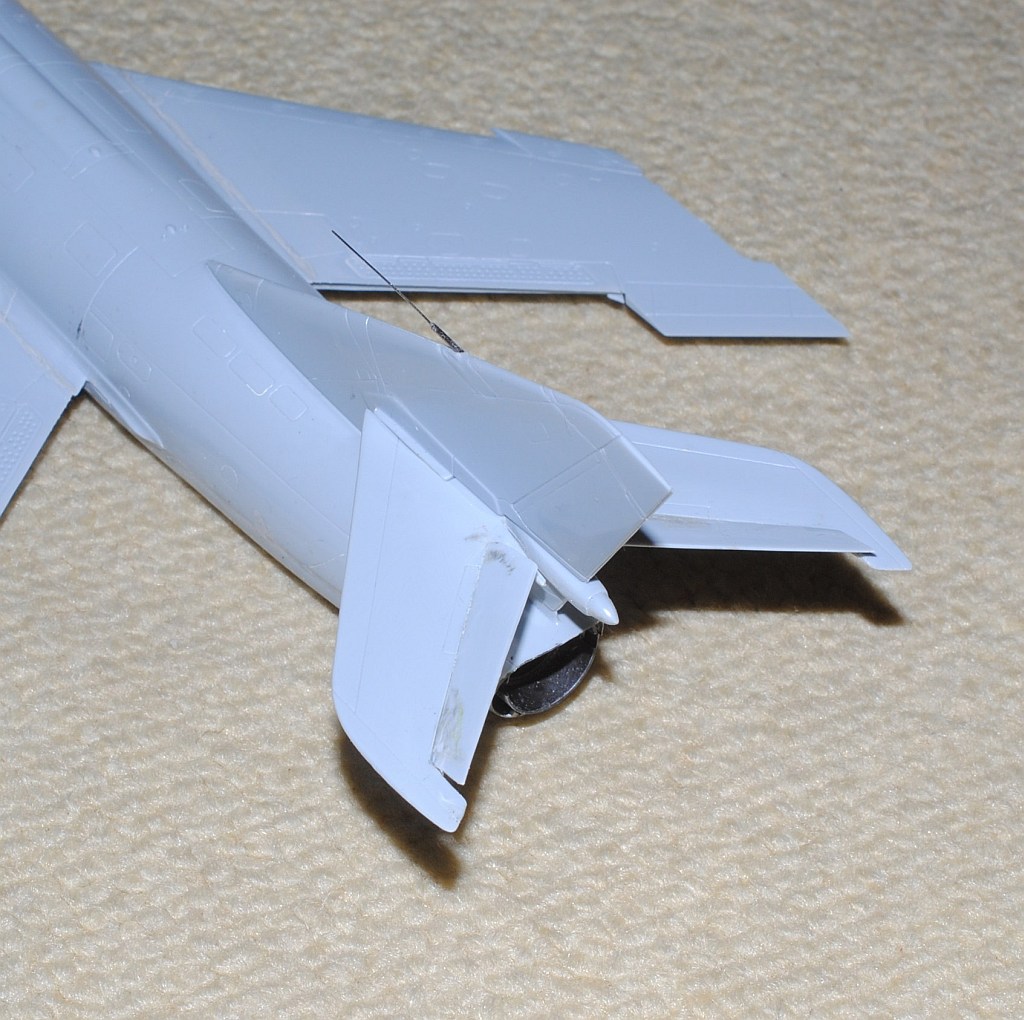
2014.4.5. Dull original pitot tube is cut and new slender one is built scratch, using injection needle (21G) and 0.3 cm white metal (nickel silver) line (red arrows: original plastic, green arrows: new one), then glued into vertical tail fin.
This weekend's achievement
2014.4.12. After anterior edge of the air intake is sharpened with sandpaper, upper main wing and intake is glued.
This weekend's achievement
2014.4.20. Since elevators are up at catapult-assisted takeoff, according to the reference (elevators up: green, and flaps down: red), I cut elevators from horizontal tailplane with exact knife and glued in upward position - Photo-1, Photo-2.
This weekend's achievement
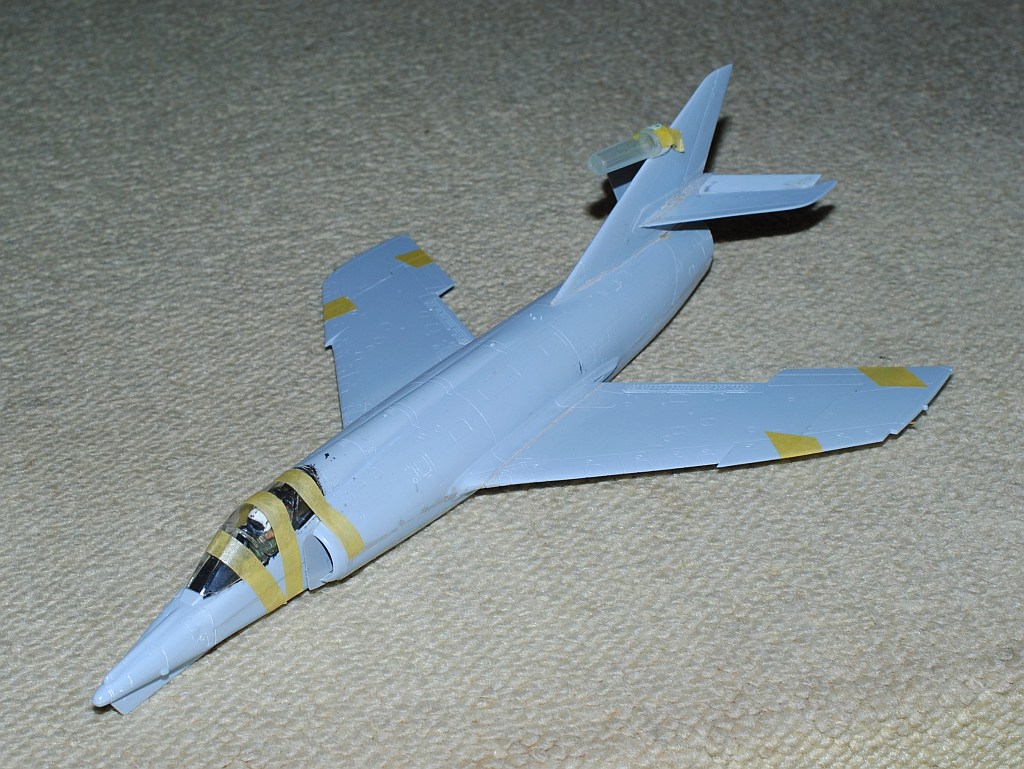
2014.5.3.-5.5. Canopy and external outer wings are glued - Photo-1, Photo-2.
This weekend's achievement
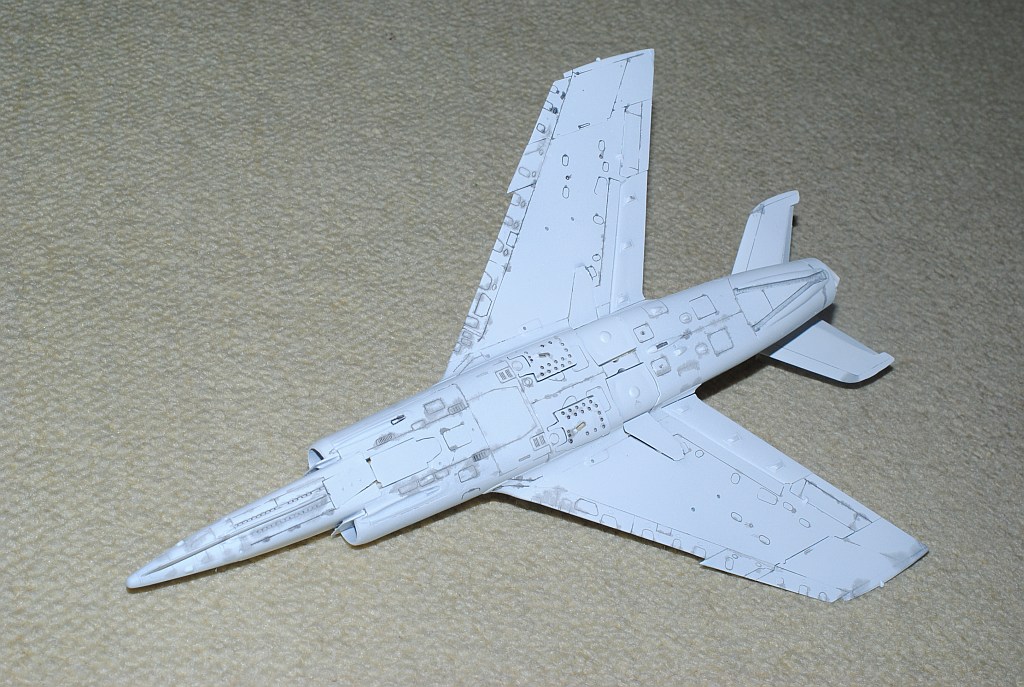
2014.6.6.-6.7. After surface primer (white) is sprayed, panel line accent color (black, Tamiya) is applied - Photo-1 Upper surface, Photo-2 Under surface white will be as this state.
This weekend's achievement
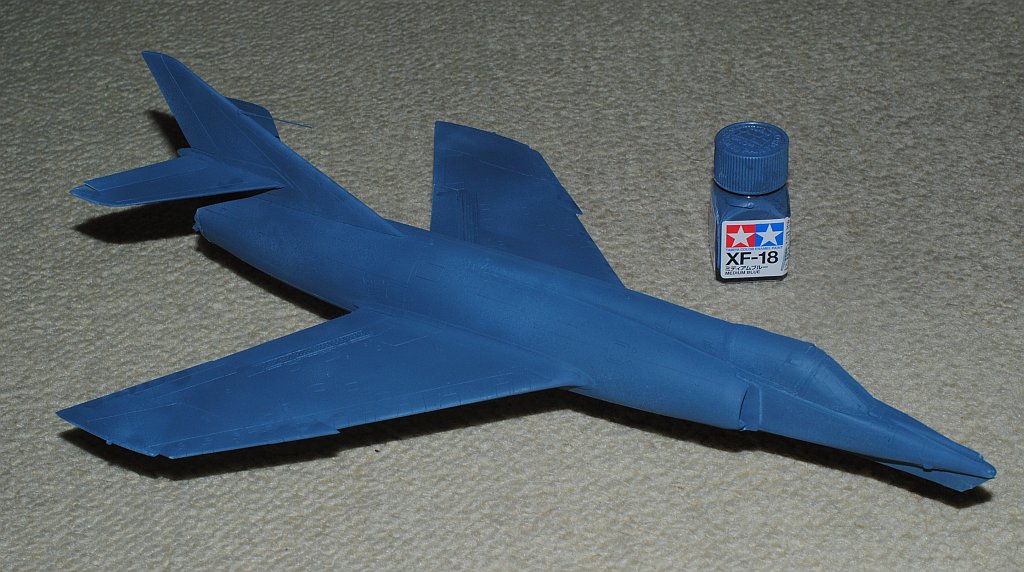
2014.6.14. Upper-surface navy blue is sprayed (Tamiya XF-18 medium blue) using Zoukeimura Airtex2 air brush, after masking underside white and canopy glass.
This weekend's achievement
2014.6.28. I sprayed again upper navy blue very, very thinly as finish - Photo-1, Photo-2. After drying, I carefully and with trepidation peeled off the masking covering the ventral white - Photo-3, Photo-4.

This weekend's achievement
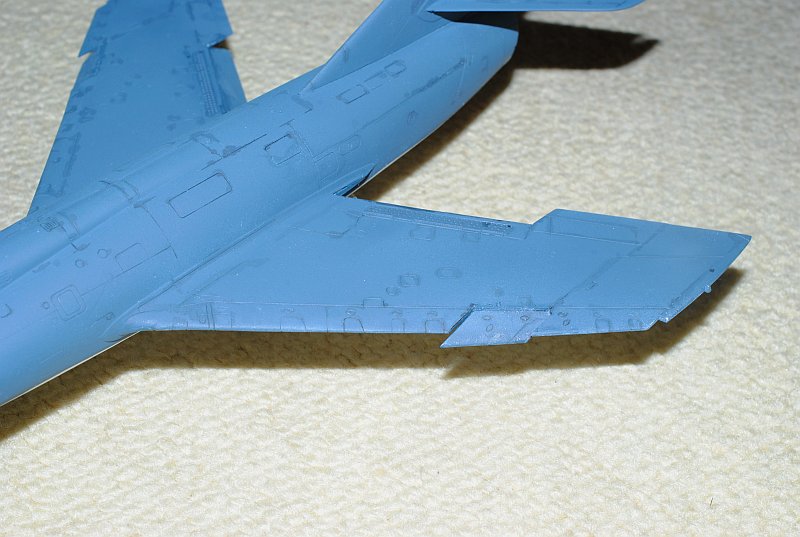
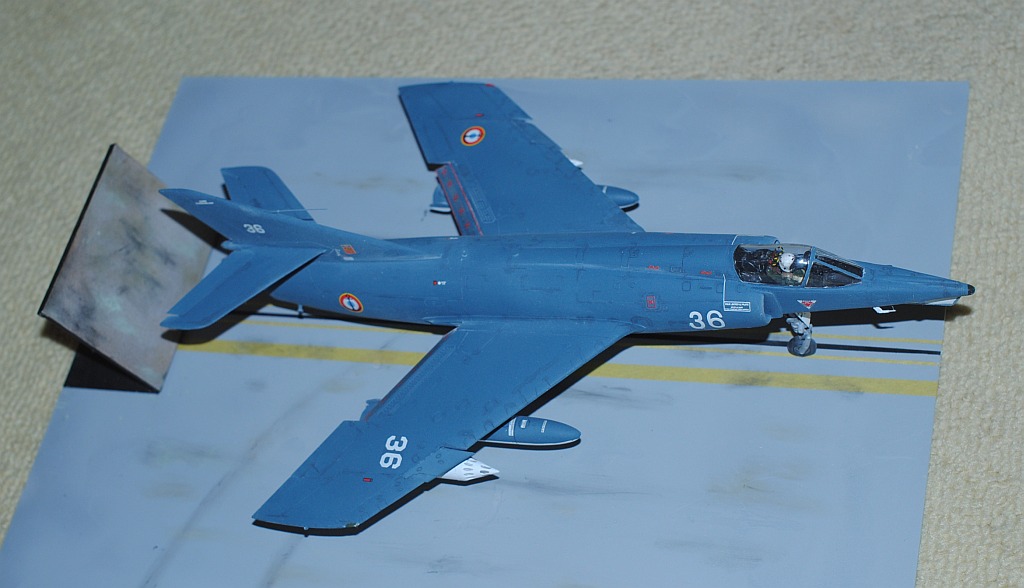
2014.7.5. My intention is to make diorama of taking-off operation of this aircraft on the flight deck, I cut the leading edge slat and glued them in down position. I should have done this before assembly, but I noticed this idea after spraying navy blue - Photo-1, Photo-2 close-up view. On some photos, median-side leading-edge slats too are moderately downed, to maximally augment aerodynamic lift at flying-off.
This weekend's achievement
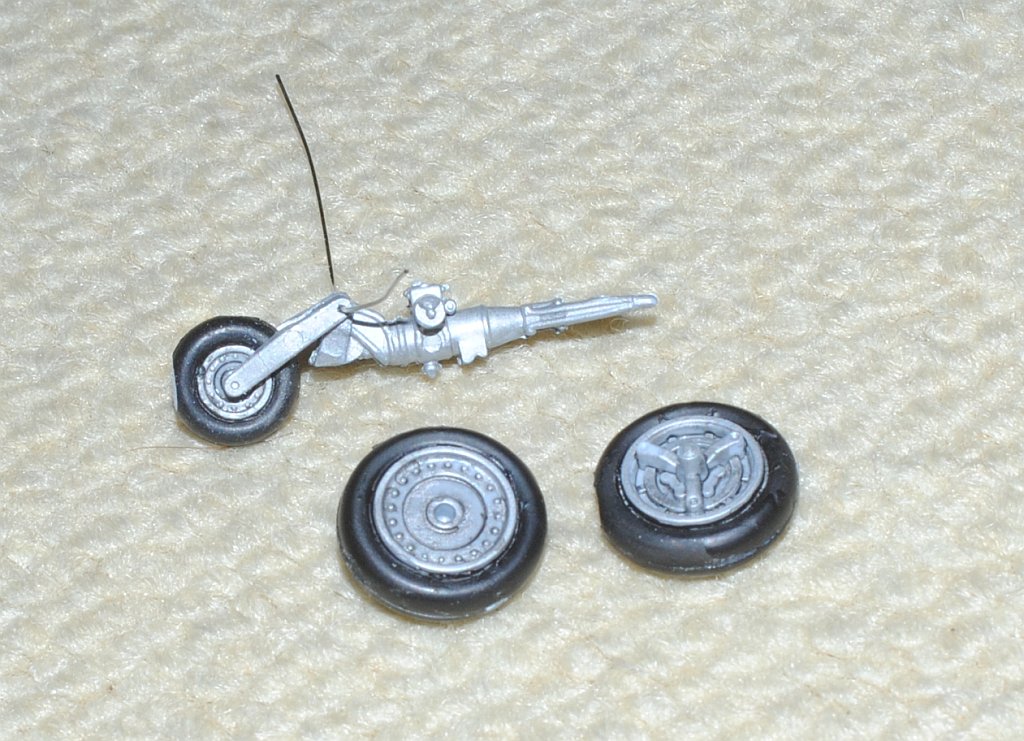
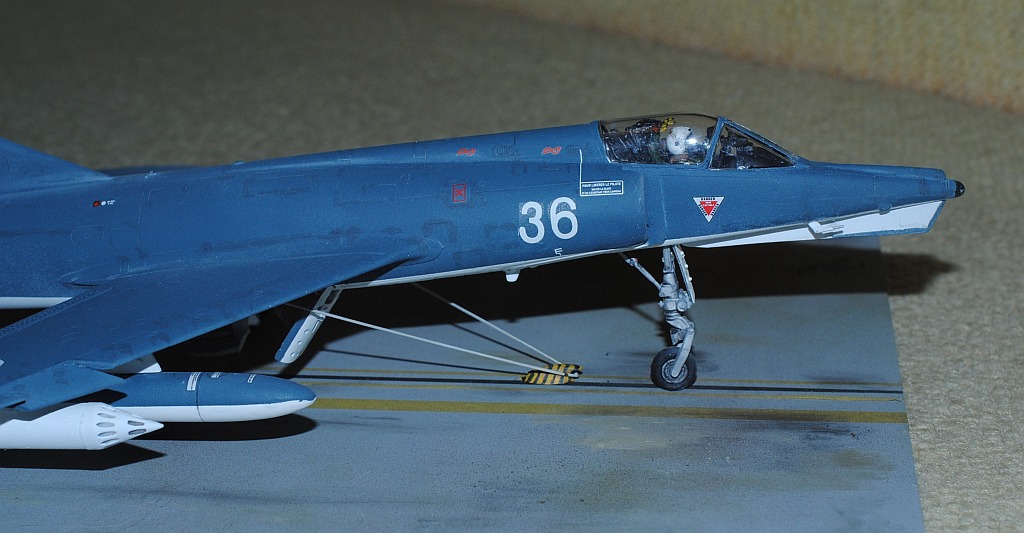
2014.7.12. To reenact the flying-off position on the flight deck of aircraft carrier Clemenceau, I cut the shock absorber portion of the nose wheel leg, and reinforce the supporting member with use of 0.4 mm brass wire - Photo-1. Tyres are painted - Photo-2. Then, nose wheel leg is glued with quick setting adhesive (brass line will be cut later) Photo-3.
This weekend's achievement
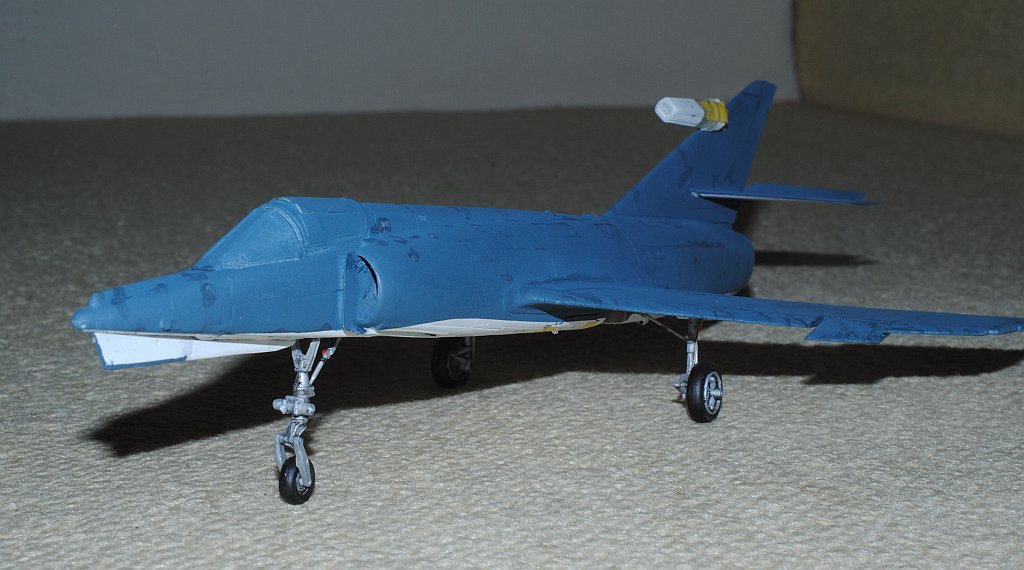
2014.7.19-20. Consulting with the reference image (right half), I added piping of the main legs with 0.5 mm brass line (left half). Ditto, green arrows for real thing, yellow arrows of piping of my model. Nose and main wheel legs are glued, then retraction jacks and tires glued.
Looking good for high elevation-angled position for taking-off from the flight deck of aircraft carrier Clemenceau.
This weekend's achievement
2014.7.26. Main wheel covers and air brakes are glued - Photo-1. Pylons for armaments are punched for 0.6mm piano wire to reinforce the bonding plane, as these under-surface structures are often accidentally dropped after the model finished - Photo-2. Now, drop tanks and armaments are prepared, JR-150 rocket launcher, auxiliary fuel tanks, Douglas in-flight refueling pack (so-called "buddy" pack) - Photo-3. Inboard and outboard pylons are fixed - Photo-4, Photo-5. Actually, medial wheel doors and air brakes are in closed position when taking-off on catapult. Since I want internal structure of the well remaining visible, I select this position - Photo-6.
This weekend's achievement
2014.8.2. Arrestor hook is glued (pink arrows) - Photo-1, followed by decals being applied firstly on the under surface - Photo-2.
This weekend's achievement
2014.8.15. Remaining upper-surface decals are applied, with small delicate stencils supplied with this kit (Made in France) - Photo-1. Diorama starts to be prepared, my project is to reenact with the diorama of Etendard on French aircraft carrier Clemenceau in 1964 - Photo-2.
This weekend's achievement
2014.9.6. After clear flat spray over the upper surface is finished (mainly to protect decals), I advance to making diorama on the flight deck.
Deflector for exhaust jet is seen on this photograph from ref.1 below Photo-1. This is real, probably, French carrier before le Charles de Gaulle generation, most likely Clemenceau. An Alouette helicopter flies alongside to prepare for contingency (failed take-off). Next, these are my diorama of Etendard just before taking-off from the flight deck with opened exhaust deflector - Photo-2, Photo-3. Close-up of cockpit - Masking over clear parts worked satisfactorily, with sharp edges - Photo-4.
This weekend's achievement
2014.9.20.-22. According to this reference photo (from ref. 1. on below list), catapult hook's shape and color (yellow and black stripe!) can be seen. BTW, this is Super Etendard - Photo-1. I made this hook de novo with plastic bar and plate, then paint yellow firstly - Photo-2, then striped with black color - Photo-3. Now is the time for diorama making of flight deck landscape - Just set on the catapult, ready to go! Salty texture of navy aircraft with navy blue and white is fairly well reproduced, I would think (self-admiration?) - Photo-4 - and close-up view - Photo-5. Sense of tension prevails on the flight deck - Photo-6. Now I am preparing figures of supporting deck officers.
This weekend's achievement
2014.10.4. From reference book # 1 in the below list, coloring of the garment of the flight-deck crew is quite conspicuous. BTW, this is Aircraft Carrier Charles de Gaulle (Exhaust deflector is very large in the new generation, my model is aimed at Carrier Clemenceau) - Photo-1. I paint figures with brush,,, Only yellow crew (No.5 on the back) has transceiver to communicate with the pilot to give instruction to GO! - Photo-2, Photo-3, Photo-4. Red-and-white sidelines on the base of the exhaust deflector, too, is painted after masking with tape - Photo-5, Photo-6, catapult take-off with opened deflector for exhaust jet is seen on this photograph from ref.1 below - Photo-7.
Crew enlarged (Crick to enlarge).
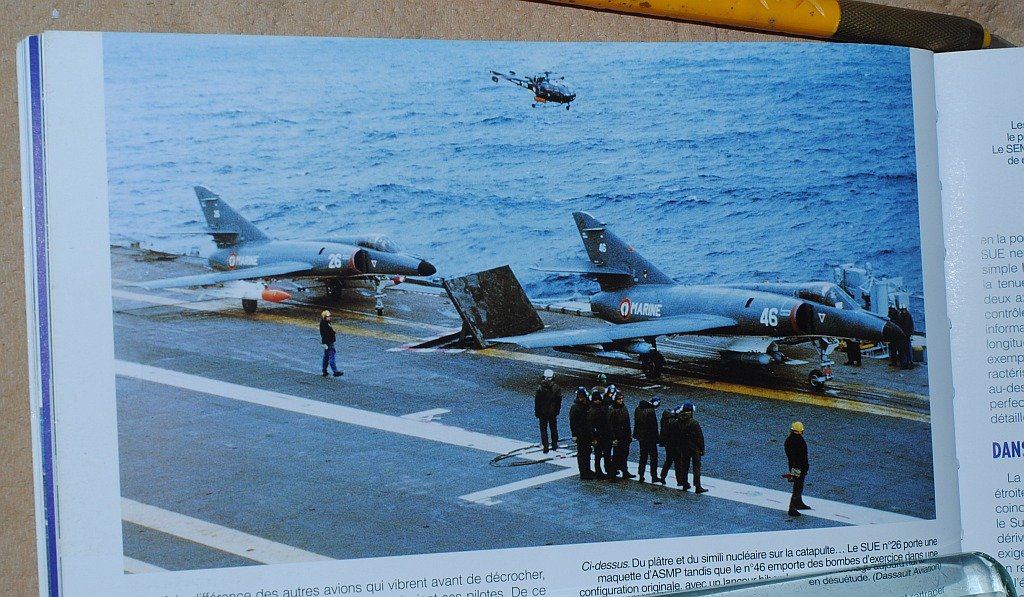
Real photograph from ref.1 (Crick to enlarge).
Now I enjoy wiskey on the rock vieing the completed diorama presentation of this aircraft
References:
I have already collected the references, though all are of SUPER etendard (upgraded version of Etendard in late 70s) .
1. Frederic Lert and Nicolas Gohin: Dassault Super Etendard (Les Materiels De L'armee De L'air Et De L'aeronavale). Histoire & Collections (2011/1/19).
2. Dassault Super Etendard, Group 5 Number 51, in Aircraft of the World. the Complete Guide (leaflets for filing), International Masters Publishers, Inc., PA, USA
3. William Green: G.A.M. Dassault Etendard IV M (4MB). In: The World's Fighting Planes, 4th revised edition, pages 15-16, Macdonald & Co., London, Great Britain, 1964.
4. I received invaluable drawings from Mr (or Dr) Karl Temple at site Fort Worth Aviation Museum - Photo-1, Photo-2 cutaway drawing of IV M, Photo-3 IV P, Photo-4 IV M.
Back to "Scale Model Hobby" Index Page
version 1.00 2024/8/1 Akio Hasegawa, M.D.
Please send your comments to akio-h@fg-khn.jp
Back to previous Home Page at AOL (Till October 31 2008)
Back to previous Home Page at geocities.jp web host (Till March 31 2019)
Back to New Home Page (Translocated Sakura server)